Introduction
The previous article on this blog was about
squeezing cycles out of framer-engine's GBA renderer. This one is about
something that has to be settled before any of that renderer work is
possible at all: how do you run an Entity Component System — the
architecture pattern the whole engine is built around — on a console with
32KB of fast RAM, 256KB of slow RAM, no operating system, and no
malloc() you can lean on?
framer-engine's answer is a second, much smaller ECS implementation
living behind the same interface as the desktop one. Every game-logic
line — component definitions, systems, queries — is identical between a
PC build and a GBA build. Only one file differs: which world.c gets
linked in.
Two ECS backends, one interface
framer-engine's default ECS backend is Flecs, a full-featured ECS used
for desktop and handheld targets with a real OS underneath (PSP, 3DS,
Switch, PC). Flecs is excellent at what it does — archetypes, queries,
observers, relationships — but all of that bookkeeping assumes a working
heap it can grow and shrink as entities and component types come and go.
That's simply not available on a target like the GBA: 32KB of IWRAM,
256KB of EWRAM, both fixed-size and fully accounted for from the moment
the ROM boots, with no MMU and no OS to page anything in. There's no heap
to assume.
Rolling a second full-featured ECS to fit that budget wasn't the
answer either — that's a lot of complexity to maintain for a problem
that doesn't need it. What GBA-class scenes actually look like is a
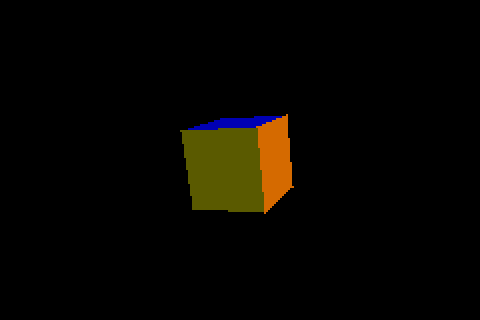
handful of objects (examples/simple_cube uses one mesh and a camera;
examples/spinning_shapes uses three), not thousands, and the
component types are known and fixed at compile time, not user-extensible
at runtime. That's a much smaller problem than "general-purpose ECS,"
and src/ecs/static/world.c — about 550 lines of plain C — is sized to
match it instead of to match Flecs:
/* Entities */
static bool s_alive[FRAMER_STATIC_MAX_ENTITIES];
static uint64_t s_comp_mask[FRAMER_STATIC_MAX_ENTITIES];

/* Component data store: row = component slot, column = entity slot.
 * Each entity slot is FRAMER_STATIC_MAX_COMPONENT_SIZE bytes wide. */
static uint8_t s_store[FRAMER_STATIC_MAX_COMPONENTS]
                       [FRAMER_STATIC_MAX_ENTITIES *
                        FRAMER_STATIC_MAX_COMPONENT_SIZE];
Every one of those arrays is a fixed-size global, sized by compile-time
constants. There is no framer_entity_create() call anywhere in this
file that can fail by running out of memory in some unpredictable way —
it can only fail by running out of array slots, a number known before
the program even starts.
Both backends sit behind the exact same include/framer/ecs.h —
framer_world_t, framer_component_register(), framer_query_create(),
framer_system_register(), the FRAMER_GET/FRAMER_SET/FRAMER_FIELD
macros. A component defined with FRAMER_COMPONENT_DEFINE(Velocity) and
a system registered with framer_system_register() compiles and runs
unchanged on either backend; which one a build gets is a single Meson
option, -Decs=flecs or -Decs=static, and GBA's cross file pins it
to static (Flecs needs an OS, and bare-metal GBA doesn't have one) —
the build refuses to configure any other way for that target.
Entities are array slots, nothing more
An entity in this backend isn't an object — it's a 1-based index into
those parallel arrays. framer_entity_create() finds the lowest dead
slot and claims it, first-fit:
framer_entity_t framer_entity_create(framer_world_t *world)
{
    int i;

    for (i = 0; i < FRAMER_STATIC_MAX_ENTITIES; i++) {
        if (!s_alive[i]) {
            s_alive[i] = true;
            s_comp_mask[i] = 0;
            if (i + 1 > s_entity_high)
                s_entity_high = i + 1;
            return EID(i);
        }
    }
    return 0; /* pool exhausted */
}
That's the entire allocator. No free list to maintain, no fragmentation
to worry about — there's nothing to fragment when every slot is the same
fixed size and lives at a compile-time-known address. The price for that
simplicity is explicit and deliberate: destroying entity 5 and creating a
new one immediately afterward hands back the same ID, 5, for a
completely different logical entity. There's no generation counter to
tell the two apart. For the scene sizes and lifetimes this backend
targets — a handful of objects that mostly live for the whole level, not
a churn of thousands spawning and despawning every frame — that's an
acceptable trade, not an oversight; it's directly covered by a unit test
(test_entity_slot_recycled_first_fit) precisely so it stays a known,
intentional property instead of a surprise.
Components: a bitmask and a flat array
Each entity slot carries one uint64_t bitmask, one bit per registered
component type. framer_component_set() is a memcpy into a
fixed-stride row of the flat s_store array, plus a bit set:
void framer_component_set(framer_world_t *world, framer_entity_t e,
                          framer_id_t id, const void *data)
{
    int ei = EIDX(e);
    int ci = cidx(id);
    /* ...bounds and liveness checks elided... */
    memcpy(&s_store[ci][ei * FRAMER_STATIC_MAX_COMPONENT_SIZE], data,
           s_comp[ci].size);
    s_comp_mask[ei] |= ((uint64_t)1u << ci);
    s_any_mask |= ((uint64_t)1u << ci);
}
A query is just a precomputed mask built from the component ids it asks
for; matching an entity against it is one AND and one comparison
((s_comp_mask[ei] & mask) == mask). The uint64_t bitmask is also
the hard ceiling on how many distinct component types can exist in one
world — 64 — which is generous for a retro scene's needs but means the
type system itself enforces "don't try to build something Flecs-shaped
on top of this."
War story: a silent NULL deref vs. a loud abort()
The single most important property of this backend isn't the data
layout — it's what happens when a limit is hit. Early on,
framer_component_register() returned 0 when a component was too big
or the registry was full, the same "just signal failure" convention used
everywhere else in this API. That sounds reasonable until you trace what
a 0 component id actually does downstream: framer_query_create()
silently skips it when building a query's mask, and the system that
registered that query goes on to call FRAMER_FIELD() for a field that
was quietly dropped — which dereferences NULL on the system's very next
matching entity. That's exactly what happened on a real GBA build: a
Text component at 288 bytes against a 64-byte cap, and 17 registered
component types against a cap of 12. The crash that surfaced wasn't "your
component is too big," it was a NULL-pointer SIGSEGV deep inside a render
system, two layers removed from the actual mistake.
The fix removes the silent path entirely:
if (size > FRAMER_STATIC_MAX_COMPONENT_SIZE) {
    fprintf(stderr,
        "framer_component_register: \"%s\" is %lu bytes, "
        "exceeding FRAMER_STATIC_MAX_COMPONENT_SIZE (%d)\n",
        name ? name : "?", (unsigned long)size,
        (int)FRAMER_STATIC_MAX_COMPONENT_SIZE);
    abort();
}
abort() rather than an assert() or a GCC/Clang-specific builtin,
because this backend also has to compile under cc65 and SDCC for
8-bit targets — plain C89 abort() is the one failure primitive
guaranteed to exist everywhere this code runs. The test suite verifies
the contract, not just the arithmetic: test_ecs_static_limits.c
forks a child process, registers one component past the limit inside it,
and asserts the child died of SIGABRT rather than returning normally
— proving the fail-loud path actually fires, not just that the size
check's math is correct.
The broader lesson generalizes past this one bug: on a backend built
entirely out of fixed-size arrays, every hard limit is a wall, not a
suggestion. The only choice that matters is whether you hit that wall
with a clear error message at the exact call site that caused it, or
with a corrupted query and a crash three function calls away. This
backend picked loud, on purpose, everywhere a hard cap exists.
Sizing the pools, and a second silent-failure bug
Each target's meson.build picks FRAMER_STATIC_MAX_COMPONENTS,
FRAMER_STATIC_MAX_ENTITIES, and FRAMER_STATIC_MAX_COMPONENT_SIZE
to fit what that platform actually needs — there's no universal default
that's right for every target, because the engine registers its full set
of core components (Transform, Velocity, Sprite, Light,
Text, Camera, and so on — 19 today) unconditionally, regardless
of whether a given example actually uses all of them:
# Embedded (system == 'none'):
-DFRAMER_STATIC_MAX_COMPONENTS=19
-DFRAMER_STATIC_MAX_ENTITIES=96
-DFRAMER_STATIC_MAX_COMPONENT_SIZE=64
That MAX_ENTITIES=96 number has its own bug story behind it. Each
registered component type — not each entity actually created — reserves
one sentinel slot out of the same entity pool, so the entities actually
available to a scene is MAX_ENTITIES minus however many component
types exist. At MAX_ENTITIES=64 and 19 components, that left 45 usable
slots — comfortably enough for examples/simple_cube, but one short of
examples/input_tester's 48 (47 on-screen panel entities plus one
camera). The failure mode was, again, silent: framer_entity_create()
returning 0 once the pool filled, and the caller that wanted one more
entity for a gamepad-axis label simply never got it — the text just never
appeared on screen, with nothing in the logs to say why. Raising the cap
to 96 (77 free after the 19 sentinels) fixed it with headroom to spare.
On the GBA build that growth costs about 544 bytes of IWRAM (three
per-entity arrays scale with the cap), which was checked against the
build's actual free IWRAM margin before landing — on a 32KB budget,
guessing isn't good enough, you measure.
That measurement habit is the same one from the performance article:
arm-none-eabi-size -A on a current GBA build shows exactly where this
backend's memory actually goes. The flat component store
(19 × 96 × 64 bytes ≈ 114KB) is placed in EWRAM's .sbss section — too
big for IWRAM, and zero-initialized for free by the startup code without
costing any ROM space:
#ifdef GBA
#define _FRAMER_STORE_ATTR __attribute__((section(".sbss")))
#else
#define _FRAMER_STORE_ATTR
#endif

static uint8_t _FRAMER_STORE_ATTR
    s_store[FRAMER_STATIC_MAX_COMPONENTS]
           [FRAMER_STATIC_MAX_ENTITIES * FRAMER_STATIC_MAX_COMPONENT_SIZE];
Everything else — the alive flags, the masks, the per-frame iterator's
entity list — is small enough to live in IWRAM, the GBA's fast 32KB
scratch memory, where the CPU actually wants its hot working data. On
the current examples/simple_cube build that's roughly 19.5KB of
IWRAM used out of 32KB, leaving real headroom for the next component or
two — a number worth checking again every time that count grows, the
same way the 96-entity fix had to be checked against it.
The scan loop, briefly
framer_world_progress() walks every registered system, in phase
order, and for each one scans entity slots up to the high-water mark
(s_entity_high, one past the highest slot any entity or component
sentinel has ever occupied) looking for bitmask matches. That scan, and
the sticky s_any_mask check that skips it entirely for systems whose
component type no entity has ever had, was the single biggest win in
the previous article's performance work — covered there in full, since
it's a perf story more than a design story. The design point that
matters here is simpler: this is a linear scan over a flat array, not a
sparse-set or archetype-table lookup. That's the right trade at GBA
scene sizes (tens of entities), and the wrong one at thousands — which is
exactly the line where you'd reach for Flecs instead.
What this design explicitly gives up
None of the above is free, and being upfront about the trade-offs is the
point of having two backends instead of pretending one ECS fits every
target:
- No entity generations. As covered above, IDs are recycled
immediately and look identical to the entity that previously held
them.
- No archetypes, no sparse sets. Matching is a linear scan with a
bitmask test, not a cache-optimized contiguous iteration over exactly
the matching entities. Fine at dozens of entities; the wrong tool past
that.
- 64 component types, total, forever, for the whole world. Not per
query — for every component type that exists anywhere in the engine,
shared across every system. The engine's current 19 leaves room to
grow, but a "just add a component" change always has a final cost
attached: someone, somewhere, has to recheck that ceiling.
- No relationships, no hierarchies, no observers. Flecs has all of
these; this backend has entities, components, and queries, deliberately
nothing more.
Every one of these is a real capability Flecs has and this backend
doesn't. They're also exactly the features that cost the heap, the
dynamic bookkeeping, and the unpredictable-at-compile-time memory use
that a bare-metal ROM target can't afford. The two-tier split exists so
that trade only has to be made once, explicitly, per target — not
silently, by whichever ECS happened to compile.
Where this goes next
The same problem — "no OS, no heap, fixed memory map, known component
set" — is true of every retro target on framer-engine's roadmap, not just
the GBA. The 32-bit-era consoles mentioned in the previous article's
closing section, starting with the PlayStation 1, sit in an interesting
middle ground: dramatically more RAM and a real GPU compared to the GBA,
but still no OS and still nothing resembling a desktop heap. The
expectation going in is that they'll want this same static backend, just
with much larger pool constants — not Flecs, and not a third ECS
implementation. Whether that expectation survives contact with an actual
PS1 build, the way the "obviously correct" tricks in the performance
article sometimes didn't survive contact with measurement, is exactly
the kind of thing a future article on this blog will have to report
honestly either way.
Introduction
framer-engine is a small cross-platform ECS game engine I've been
building, with backends ranging from desktop OpenGL/Vulkan down to bare
software rendering on 8/16-bit consoles. The Game Boy Advance backend
renders actual textured/shaded 3D meshes — cubes, cones, spheres — through
a CPU-only software rasterizer, on a 16.78MHz ARM7TDMI with no FPU and
no hardware polygon fill. Every float operation is a soft-float library
call, every divide is a library call, and every pixel is a CPU
read-modify-write into VRAM.
This article is about what it actually takes to make that fast — not in
theory, but measured. Every number below comes from
scripts/debug/gba/cycle_probe.py, a small script that sets a
breakpoint on the engine's vblank-wait function inside headless mGBA
and reads the emulator's cycle counter on every hit. mGBA's CPU emulation
is deterministic: the same ROM run with the same inputs produces
bit-identical cycle counts every time, which means an optimization claim
isn't "it looked smoother" — it's "frame N now costs X fewer cycles, every
single run." I discard the first ~100 frames as warm-up (caches, branch
predictor-equivalent effects, lazy first-frame setup) and average the
steady-state window after that.
That discipline matters more than any individual trick below, because
twice during this work an optimization that was obviously, mathematically
correct measured as a regression. More on that at the end.
The hardware constraint that drives everything
The GBA's display is locked to the LCD's scanout rate. A frame takes
exactly 280896 cycles of the system clock to display, whether or not
your CPU work fits inside it — if you go over, you just drop to displaying
every other frame (or worse), the displayed frame rate quantizing to
59.73 / n for whatever integer multiple of that budget your frame
actually costs. There's no "GPU" to defer to and no way to partially
miss the deadline gracefully. The entire optimization exercise is: get
the CPU-side frame cost under (or as close as possible to) 280896 cycles.
Every technique below exists because of two specific limits:
- No FPU. Any float/double arithmetic — multiply, divide,
sqrtf(), sinf()/cosf()/tanf() — compiles to a call into
ARM's soft-float runtime. That's not "slower than native float," it's
"a function call plus a software algorithm" for every single operation.
- No hardware rasterizer. Mode 4's bitmap layers are just VRAM you
write to with the CPU. Every triangle the software renderer fills is
pixels the ARM7TDMI itself has to compute and store, one at a time.
Technique 1: fixed-point math instead of float
The most foundational change is also the simplest to state: the hot path
(per-vertex transform, per-pixel rasterization) uses Q12 fixed-point
integers instead of float, via a small fix_t type
(src/backends/renderer/common/sw3d_fixed.h):
typedef int32_t fix_t;

#define FIX_SHIFT 12
#define FIX_ONE   (1 << FIX_SHIFT)   /* 4096 == 1.0 */

static inline fix_t fix_mul(fix_t a, fix_t b)
{
    return (fix_t)(((int64_t)a * (int64_t)b) >> FIX_SHIFT);
}
fix_mul's int64_t intermediate looks like it should be expensive,
but on ARM it lowers to a single hardware SMULL (signed multiply,
64-bit result) instruction — no library call, no precision tricks, just
the right type for the CPU's native multiply. Compare that to a
float * float, which on this target is a soft-float call doing
mantissa/exponent bookkeeping in software.
Division is the one place fixed-point still hurts, because there's no
hardware divider on the ARM7TDMI either way — fixed-point divide still
costs a library call (__aeabi_idivmod et al.), just an integer one
instead of a float one. The perspective-divide hot path exploits a
narrower fact about that specific division to cut its cost further:
/* fix_div()'s general implementation widens to a 64-bit intermediate to
 * stay correct for arbitrary numerators, but the perspective divide's
 * numerator is always FIX_ONE, so FIX_ONE << FIX_SHIFT never exceeds
 * 32 bits. */
static inline fix_t fix_reciprocal(fix_t b)
{
    return (fix_t)(((int32_t)FIX_ONE << FIX_SHIFT) / b);
}
That one change — replacing the general 64-bit fix_div() with a
32-bit-only reciprocal for the one call site where the numerator is known
to always be FIX_ONE — measured a ~50,000 cycle/frame saving on
examples/spinning_shapes, just from giving the divide routine a
narrower, cheaper problem to solve.
Technique 2: a LUT instead of sinf()/cosf()
framer_transform_get_matrix() (the shared, cross-platform transform
code) builds rotation matrices via cglm's glm_rotate_{x,y,z}(), which
call cosf()/sinf(). On desktop that's a couple of FPU
instructions; on the GBA it's a soft-float libm round trip, once per
axis, per object, per frame.
The GBA backend instead carries its own 256-entry sine table
(sw3d_raster.c), reading cosine from the same table at a quarter-turn
offset, with linear interpolation between samples:
static const fix_t gba_sin_lut[256] = { /* ... */ };

static void gba_fast_sincosf(fix_t angle_turns_256, fix_t *s, fix_t *c)
{
    int idx = angle_turns_256 & 0xff;
    int cidx = (idx + 64) & 0xff; /* cos(x) == sin(x + tau/4) */

    *s = gba_sin_lut[idx];
    *c = gba_sin_lut[cidx];
}
256 entries means ~1.4° between samples — far finer than visible on a
240x160 screen, so the linear interpolation error never shows up as
visible jitter. Swapping this in for the float sin/cos chain, measured
A/B (git stash + identical build/measure commands) on
spinning_shapes (which rotates 3 objects on all 3 axes every frame):
1,294,320 → 1,234,341 cycles/frame, a ~4.6% reduction, from removing
one class of soft-float call entirely.
A follow-up went further: rather than building the rotation matrix the
way cglm does — up to three separate generic 4x4 matrix multiplies, one
per nonzero Euler axis, each a 64-multiply-add matmul even though most
entries of a pure-axis rotation matrix are 0 or 1 — the combined
Rz·Ry·Rx product's 9 nonzero 3x3 entries are expanded by hand from the
three angles' sin/cos (still sourced from the LUT above) and folded into
the output with a single glm_mat4_mul instead of up to three:
/* out = Rz * Ry * Rx, 9 nonzero entries expanded by hand instead of
 * three generic 4x4 matmuls. */
out[0][0] = cy * cz;
out[0][1] = cy * sz;
out[0][2] = -sy;
out[1][0] = sx * sy * cz - cx * sz;
out[1][1] = sx * sy * sz + cx * cz;
out[1][2] = sx * cy;
out[2][0] = cx * sy * cz + sx * sz;
out[2][1] = cx * sy * sz - sx * cz;
out[2][2] = cx * cy;
This was verified against the original three-matmul path via NumPy
differential testing across all 8 zero/nonzero axis combinations plus
thousands of random angle triples (max absolute error ~1e-16) before it
ever touched the renderer. Measured gain: only 1,309,080 → 1,306,224
cycles/frame, ~0.22% — much smaller than the raw operation count
suggests, because the compiler's optimizer already folds away most of the
original chain's zero/one multiplies once each Rz/Ry/Rx factor
starts from an identity-seeded matrix. The lesson here isn't "this
technique didn't matter" — it's that hand-expanding math only pays for
itself once you've checked what the compiler was already doing for you.
A second, branch-free variant that skipped the matrix multiply
altogether (translation column copy + per-column scale) was also tried
and measured worse in every iteration than this simpler one-matmul
version — discarded in favor of what actually measures faster.
Technique 3: Quake III's fast inverse square root
Triangle shading needs each surviving triangle's world-space normal,
normalized — once per shaded triangle, per frame, in the single hottest
loop of the renderer. cglm's glm_vec3_normalize() calls sqrtf()
and then divides by it: two soft-float library calls per triangle.
The fix is the famous bit-hack:
static float sw3d_fast_inv_sqrt(float number)
{
    union { float f; uint32_t i; } conv = { .f = number };

    conv.i = 0x5f3759df - (conv.i >> 1);
    conv.f *= 1.5f - (0.5f * number * conv.f * conv.f); /* one Newton-Raphson step */
    return conv.f;
}
One magic-constant bit-shift gets a rough inverse-square-root estimate
straight from the float's IEEE bit pattern (no sqrt call at all), and one
Newton-Raphson correction step sharpens it to be visually indistinguishable
from the real thing for lighting purposes. Replacing both the sqrt and
the divide with this one function, used at every site in the GBA backend
that previously called glm_vec3_normalize() (face-normal lighting in
the renderer, and the rasterizer's own triangle-normal centroid
computation), removes two soft-float calls per triangle for one cheap
integer/float hybrid op.
Technique 4: an ECS dispatch early-out
Not every win is renderer-specific. framer_world_progress(), the ECS
scheduler's per-frame loop, walked every registered system's full entity
range every frame — including systems whose query needs a component type
that no entity in the scene has ever had. simple_cube registers
collider/velocity/rigidbody systems unconditionally on every platform
(component import is unconditional, regardless of whether the scene
actually uses them), so most of those systems were scanning entities every
frame only to match zero of them, every single time.
The fix tracks a sticky OR of every component bit ever set across the
world's lifetime, and skips a system's scan entirely — O(1), no entity
walk at all — whenever its query's required mask includes a bit outside
that set, which can provably never match:
/* s_any_mask: sticky OR of every component bit ever set across the
 * world's lifetime. A query whose mask requires a bit outside this set
 * can never match any entity — skip the per-entity scan entirely. */
if ((q->mask & world->s_any_mask) != q->mask)
    continue;
This is the single largest win found across the whole project:
simple_cube: 308650 → 288629 cycles/frame; spinning_shapes:
757806 → 744701 cycles/frame (both steady-state averages over frames
101-150). A scheduler-level fix, not a renderer trick, but it followed
from the exact same discipline: measure where the cycles actually go,
don't assume.
Technique 5: making divides Bresenham-shaped
The scanline rasterizer (sw3d_fill_triangle()/sw3d_fill_quad())
originally tested every pixel inside each triangle's bounding box against
all three edge functions to decide if it was inside. The replacement
computes each row's [lo, hi] x-span directly per edge, incrementally,
which is exactly Bresenham's line algorithm applied to "x as a function of
y" along a triangle edge:
/* Incrementally tracks bound(y) = floor((b0 + (y - y0) * d) / a) for a
 * fixed positive `a`, one row at a time, with zero divisions after
 * init. The GBA's ARM7TDMI has no hardware divider, so trading one
 * division per edge (at init) for what used to be a same-sign test on
 * every bounding-box pixel is the whole point. */
struct row_bound {
    long val, step, rem, err, a;
};
This turns "one division-equivalent test per candidate pixel" into "one
division per triangle edge, plus an integer add per row" — a meaningful
shape change on hardware with no hardware divider at all.
It also produced one of the more unusual micro-optimizations in the
codebase. The one division this scheme still needs per edge
(floordiv_pos()) is built on a / b and a % b in C, which GCC
is supposed to fuse into a single __aeabi_idivmod call when both are
needed. Disassembly showed that fusion happening on one branch
(a > 0) but not the other (a < 0, which negates both operands
first) — an extra, redundant __aeabi_idiv call alongside the
__aeabi_idivmod for the same division, confirmed to be a GCC
codegen quirk specific to that branch (restructuring the C source
produced byte-identical codegen either way, so it wasn't fixable from the
C side). The actual fix is to call the library function directly and
unpack its packed 64-bit r0:r1 quotient/remainder result by hand,
removing the compiler's latitude to make the wrong call-fusion choice at
all:
extern long long __aeabi_idivmod(long numerator, long denominator);

static long floordiv_pos(long a, long b)
{
    long long qr = __aeabi_idivmod(a, b);
    long q = (long)(uint32_t)qr;
    long r = (long)(qr >> 32);

    if (r != 0 && a < 0)
        q--; /* C truncates toward zero; floor() needs a -1 correction */
    return q;
}
Saved roughly 25,000-30,000 cycles/frame on spinning_shapes — for
removing one redundant library call the compiler was inserting on its
own, on one branch only, for no reason a compiler flag could fix.
Technique 6: let the hardware scale a smaller image
The GBA has no hardware polygon fill, full stop — every pixel the
rasterizer covers is a CPU read-modify-write into VRAM, which is the hard
floor under every other optimization in this list: at some point you've
removed every avoidable division and float op, and you're still bound by
"how many pixels does the CPU have to touch."
The way around that floor isn't a CPU optimization at all: Mode 4's BG2
background layer supports affine transforms even though it's a flat
bitmap — the same trick behind GBA titles that faked SNES Mode-7-style
scaling. The renderer draws only a 120x80 corner of the framebuffer (a
quarter the pixels of the real 240x160 screen) and lets BG2's affine
matrix stretch that corner across the full screen at scanout time, for
free, in hardware:
#if GBA_RENDER_SCALE == 1
static inline void gba_clear_buffer(vu16 *base) { /* full-res clear */ }
#else
static inline void gba_clear_buffer(vu16 *base)
{
    /* only clear the GBA_RENDER_WIDTH x GBA_RENDER_HEIGHT corner that's
     * actually sampled by BG2's affine matrix — the rest of the page is
     * never displayed, so clearing it is wasted work. */
}
#endif
On spinning_shapes this dropped steady-state cost from ~1.55M to
~1.28M cycles/frame — roughly 10.8fps → 13.1fps, a ~17% reduction —
at the cost of visibly blockier 2x-nearest-neighbor-scaled edges. It's
opt-in (-Dgba_half_res) rather than default, because unlike every
other technique here it's a genuine, visible quality trade-off rather
than a free win — worth calling out, since this whole article is
otherwise about zero-visual-cost changes.
The measurement discipline that makes any of this credible
None of the numbers above are estimates. scripts/debug/gba/cycle_probe.py
drives headless mGBA, sets a breakpoint on the engine's vblank-wait call
(the one point every frame reliably passes through exactly once), and
reads the emulator's own cycle counter on every hit. Because mGBA's CPU
core is a deterministic interpreter/JIT — not a real, jittery piece of
silicon — the same ROM, same breakpoint, same number of warm-up frames
discarded, produces bit-identical cycle counts on every run. That
turns "did this help?" from a vibes question into a yes/no one: rebuild,
re-run the probe, diff the number.
That discipline is also what caught the two times this project tried an
"obviously correct" optimization that wasn't.
War story 1: caching screen-space half-extents that never change
The camera's screen-space half-width/half-height, once converted to
fixed-point, don't change frame to frame unless the camera's projection
changes — so hoisting that fixed-point conversion out of the per-vertex
projection loop and caching it looked like a pure, free win: same
values, computed once instead of once per vertex.
It measured as a regression.
The likely cause, confirmed by inspecting the generated assembly rather
than guessing: this project builds with link-time optimization
(LTO) and -Doptimization=3 across the board, and LTO's inlining
heuristics are sensitive to function and loop size in ways that aren't
intuitive from the C source. Adding a cache check (even a cheap one) to
an already-hot, already-inlined loop changed the cost/benefit math the
inliner used elsewhere in the same translation unit, and the net effect
of removing unrelated, more valuable inlining outweighed the
arithmetic actually saved. The "obviously correct" loop-invariant hoist
was correct about the math and wrong about the measured outcome.
War story 2: skipping integration work for a zero velocity
The same pattern showed up again, independently, in
velocity_integration_system(). Most entities in simple_cube have
a Velocity component that's exactly zero every frame — adding a
zero-vector early-out before the glm_vec3_scale/glm_vec3_add calls
is mathematically a no-op (scaling and adding a zero vector changes
nothing), so it looked like free cycles for every entity that wasn't
actually moving:
/* tempting, and wrong on this build */
if (glm_vec3_isvalid(v->linear) && glm_vec3_norm2(v->linear) == 0.0f &&
    glm_vec3_norm2(v->angular) == 0.0f)
        continue;
Measured: +112 cycles/frame on simple_cube, +312 on spinning_shapes.
A regression, on a change with no behavior difference whatsoever. Same
root cause as the screen-extent cache: the early-out added code size and
a branch to a hot loop, LTO's inlining decisions shifted in response, and
whatever inlining was lost elsewhere cost more than the skip saved. It
was reverted in the same session it was tried, per the same rule that
caught it: measure before keeping, no exceptions for changes that "can't
possibly" make things worse.
The takeaway isn't "don't trust loop-invariant hoisting" or "don't trust
early-outs" — both are completely standard, usually-correct techniques.
It's that once a build is leaning on LTO and aggressive optimization
levels to do a lot of the heavy lifting, the compiler's own decisions
become part of the system you're optimizing, and they don't always move
in the direction your mental model of the code predicts. The only way to
know is the same cycle_probe.py round-trip used for every win in this
article: change one thing, measure, keep it only if the number actually
goes down.
Where this leaves things
After all of the above, examples/simple_cube sits at 288074
cycles/frame — 16777216 / 288074, the same ratio cycle_probe.py
itself reports for every measurement in this article — works out to
~58.24fps, against a true-60fps budget of 280896 cycles (~59.73fps).
That's about 2.5% over budget, down from a starting point of roughly
7-8% over before this round of work. spinning_shapes — three fully
shaded objects rotating on all three axes every frame, a heavier scene
by design — sits at 741378 cycles/frame, ~22.63fps. Both are ceilings
for these specific demo scenes on real, cycle-accurate emulation, not
estimates: add more triangles or lights to either scene and the
frame cost (and fps) moves accordingly. Closing the rest of that gap on
simple_cube would mean moving into riskier
territory: caching ECS query results across frames (not just the
existence-of-any-entity check from Technique 4), or pre-converting mesh
vertex data to fixed-point ahead of time instead of per-vertex at raster
time — the latter complicated by the fact that the same mesh struct is
also populated through framer-engine's public, float-only custom-mesh
API, so caching it would mean either changing that API or building a
runtime cache-on-first-use scheme. Both are real options, just bigger
ones than "swap a divide for a multiply" — a good place to stop for now
and pick back up deliberately, rather than rush into more soft-float
removal for diminishing, harder-to-verify returns.
What's next
The GBA backend was the first proof that framer-engine's "real ECS, real
3D, software-rendered, no FPU" approach actually holds up on constrained
hardware. The next targets are mainly a step up in capability rather than
a step down: 32-bit-era consoles like the PlayStation 1, and handhelds
with genuine 3D hardware acceleration — PSP, Nintendo DS, and 3DS. That
side of the plan is mostly for fun: getting framer-engine to a point
where it's genuinely pleasant to build small demos and little indie games
on real retro hardware, GBA included.
But at least one of those targets — most likely the PSP, the one with the
most conventional FPU-plus-GPU setup of the group — is also there for a
different reason. Every technique in this article exists because the
GBA has no FPU and no hardware rasterizer; on a platform that has both,
none of those specific tricks apply, and the interesting question flips
from "how do I avoid the hardware's weaknesses" to "how far can the
engine and the hardware actually go together, pushed deliberately to
their limits, with the GPU and FPU doing what they're meant to do."
That's a different kind of optimization work — closer to traditional
real-time-3D budgeting (draw calls, vertex throughput, fill rate) than
to soft-float avoidance — and it needs the same measurement discipline as
everything above, just pointed at a different bottleneck. Whether the
specific tricks in this article carry over at all won't be clear until
that work actually starts; future articles will cover whatever turns out
to be that generation's equivalent surprise.
RIOT-OS 2026.04, codenamed Fire Rizzlease, was released on May 6, 2026.
RIOT is a multi-threading operating system targeting microcontrollers found in the
Internet of Things — from 8-bit and 16-bit MCUs to lightweight 32-bit processors —
with a focus on energy-efficiency, soft real-time capabilities, and a small memory
footprint.
This release spans 84 days of development, 125 merged pull requests composed of 229
commits, and contributions from 27 people. A notable stat: 1,141,523 lines were
deleted against only 25,007 inserted, largely thanks to a major vendor code cleanup.
Codeberg mirror
RIOT is now synced to Codeberg (#21997). This gives the project a home on a
non-profit, community-driven forge alongside its GitHub presence, a welcome step
for an independent open-source project.
Massive EFM32 vendor code removal
Over one million lines of vendor code have been removed from the EFM32 family,
replaced by a pkg/gecko_sdk dependency (#22040). This is the single biggest
contributor to the impressive deletion count and results in a much leaner and more
maintainable codebase for Silicon Labs EFM32-based boards.
Raspberry Pi Pico 2 / RP2350 improvements
The RP2350 support received a thorough overhaul (#21753):
- Unified abstractions between the RISC-V and ARM cores of the RP2350.
- Added the XH3IRQ interrupt controller.
- Updated UART driver.
- Added RISC-V support.
The scope of this work was large enough to inspire a bachelor's thesis at
HAW Hamburg.
New board and CPU support
Three new targets join the supported hardware list:
- pro-micro-nrf52840 (#22089) — a popular nRF52840-based Pro Micro form-factor board.
- slstk3301a (#22069) — Silicon Labs EFM32 Tiny Gecko starter kit.
- STM32H7 (#21978) — high-performance STM32 family, with additional peripheral
support for the nucleo-h753zi (#22076).
New device drivers
- AMG88xx (#22104) — infrared array sensor (thermal camera) from Panasonic.
- ADS1X1X (#21694) — family of Texas Instruments I²C ADCs.
Guide site and documentation
The RIOT Guide Site continues to grow as the default entry point for new users,
progressively replacing Doxygen for prose documentation. This release adds:
- More tutorials.
- An experimental Supported Boards section.
- Unit tests in tutorials (#22042).
- Updated Astro v6 framework (#22145).
The Doxygen API reference remains available at api.riot-os.org.
Networking improvements
Several additions to the GNRC networking stack:
- New gnrc_pktshark module to pretty-print network traffic (#21284).
- gnrc_ipv6_nib_dyn_lladdr_get() API (#22013).
- ABR (Authoritative Border Router) now run-time configurable (#21081).
- Generic UDP shell command (#22049).
Notable bug fixes
43 bugs were fixed in this release, including:
- ESP8266 crashes on reboot and startup (#22014, #22010).
- Potential buffer overflow in the atwinc15x0 driver (#22041).
- NanoCoAP message corruption in coap_build_reply() (#22094).
- Wrong byte order for gyro and accelerometer reads in the MPU-9x50 driver (#22135).
- LVGL configuration and SDL issues on native (#22005, #22139).
The Yocto Project 6.0, codenamed wrynose, was released on May 13, 2026. This
is the new Long-Term Support (LTS) release, succeeding 5.0 "scarthgap". I am
happy to have my name in the contributors list for this release, and I wanted to
take the opportunity to write a short overview of what is new.
If you are migrating from 5.0, make sure to read the migration guides for the
intermediate releases: 5.1 (styhead), 5.2 (walnascar), and 5.3 (whinlatter).
Major component upgrades
The toolchain and core components received significant version bumps:
- Linux kernel 6.18
- GCC 15.2
- glibc 2.43
- LLVM/Clang 22.1.3
- Python 3.14.4
- systemd 259.5
- Go 1.26.2, Rust 1.94.1
- QEMU 10.2.0
- U-Boot 2026.01
Over 300 recipe upgrades in total.
Rust in the Linux kernel
One of the most significant additions is first-class Rust support for building the
Linux kernel and out-of-tree kernel modules:
- A new kernel-yocto-rust class adds the required dependencies to build Rust
components of the kernel.
- A new module-rust class supports building out-of-tree Rust kernel modules. A
skeleton example is available under meta-skeleton/recipes-kernel/rust-out-of-tree-module.
- Enabling Rust in the kernel is now as simple as adding rust to
KERNEL_FEATURES in a recipe that inherits kernel-yocto.
Security improvements on by default
Several security and hardening features that were previously opt-in are now
enabled by default in the nodistro setup:
- security_flags.inc — adds security-related compiler and linker flags.
- no-static-libs.inc — disables most static libraries.
- uninative — allows reuse of native sstate built on one distro on another,
also enabled by default now.
- OpenSSL now disables TLS 1.0/1.1 by default.
WIC is now an external project
The WIC image creator tool has been extracted from OpenEmbedded-Core and is now
maintained as a standalone project. The recipe in OE-Core now builds from
this external source. A new wicenv image type was also added.
What's next
As an LTS release, wrynose will receive long-term maintenance. If you are on
scarthgap (5.0), now is a good time to plan your migration. The migration guide
is available at the Yocto Project documentation.
The security of embedded devices has never been more critical. In a world
where attacks targeting IoT systems are becoming increasingly sophisticated,
ensuring the integrity of the boot process is a must. This is where Secure
Boot comes in—an essential technology that guarantees only authorized code can
execute on a device from the moment it starts. In this article, we will explore
the implementation of Secure Boot using AHAB, the solution provided by NXP to
secure the i.MX93 from its initial boot stages.
Why is Secure Boot crucial for your device?
A secure boot ensures that no malicious code interferes with the critical boot
process, protecting your device from attacks targeting the bootloader and early
boot stages. Furthermore, AHAB, integrated into i.MX93 processors, enables
advanced authentication right from the initial boot stages, ensuring that only
validated components can be loaded, thereby strengthening security from the
get-go.
Secure boot is a critical security feature that ensures only authenticated and
authorized code can run on a device. It operates through a chain of trust, where
each component verifies the integrity of the next element in the chain.
Several mechanisms must be used to authenticate each element of this chain, but
the mechanism for authenticating the first boot stages depends on the target SoC.
The i.MX93 series uses NXP's Advanced High Assurance Boot (AHAB) to secure the
first boot stages.
For subsequent stages, you can implement mechanisms such as:
- Using U-Boot's "verified boot" feature to sign the kernel,
- Using the default environment (cf. USE_DEFAULT_ENV_FILE), and restricting
write access to only a few environment variables (cf. ENV_WRITEABLE_LIST),
which are necessary for writable access, such as for OTA updates,
- Using DM-verity to authenticate the root filesystem,
- And finally, using OverlayFS combined with DM-crypt to mount encrypted,
writable subfolders.
Here, we'll focus on the first part of the secure boot process, using NXP's AHAB
to authenticate the bootloader on the NXP i.MX93 in single-boot mode. We will
also briefly discuss how to generate the keys to sign the bootloader and provide
an introduction to AHAB.
Note: AHAB also provides a complementary encryption feature designed to protect
the confidentiality and integrity of data, whereas secure boot focuses on
verifying the integrity and authenticity of the boot process. This post will not
cover encryption in detail.
AHAB Architecture
The AHAB authentication mechanism is based on public key cryptography using
asymmetric keys.
On the i.MX93, AHAB support is provided by a security co-processor, the EdgeLock
enclave (ELE), which handles the authentication of binaries signed with one or
more private keys. This co-processor contains fuses that must be burned with the
hash of the public keys.
AHAB Containers
Since multiple boot stages (e.g., TF-A, OP-TEE, U-Boot, etc.) and firmwares are
required to boot i.MX93 platforms, these binaries are packed into containers
using the imx-mkimage tool:
bl31.bin
lpddr4_dmem_1d_v202201.bin
lpddr4_dmem_2d_v202201.bin
lpddr4_imem_1d_v202201.bin
lpddr4_imem_2d_v202201.bin
mx93a1-ahab-container.img
tee.bin
u-boot.bin
u-boot-spl.bin
In i.MX93 single-boot mode, the bootloader image contains at least three
containers:
- mx93a1-ahab-container.img: Contains the ELE Firmware.
- u-boot-atf-container.img: Contains at least the SPL.
- flash.bin: Contains TF-A, OP-TEE, and U-Boot.
        *start ----> +---------------------------+ ---------
                     |   1st Container header    |   ^
                     |       and signature       |   |
                     +---------------------------+   |
                     | Padding for 1kB alignment |   |
*start + 0x400 ----> +---------------------------+   |
                     |   2nd Container header    |   |
                     |       and signature       |   |
                     +---------------------------+   |
                     |          Padding          |   |  Authenticated at
                     +---------------------------+   |  ELE ROM/FW Level
                     |           ELE FW          |   |
                     +---------------------------+   |
                     |          Padding          |   |
                     +---------------------------+   |
                     |       Cortex-M Image      |   |
                     +---------------------------+   |
                     |         SPL Image         |   v
                     +---------------------------+ ---------
                     |   3rd Container header    |   ^
                     |       and signature       |   |
                     +---------------------------+   |
                     |          Padding          |   | Authenticated
                     +---------------------------+   | at SPL Level
                     |            TF-A           |   |
                     +---------------------------+   |
                     |           OP-TEE          |   |
                     +---------------------------+   |
                     |           U-Boot          |   v
                     +---------------------------+ ---------
These containers are signed offline using NXP Code-Signing Tools (CST), which
also allow the creation of an OEM private key infrastructure (PKI) and the
generation of the associated public keys (SRK) table, which is burned into the
fuses. The CST can also be used with the PKCS#11 standard to access
cryptographic services from tokens or devices such as HSM, TPM, and smart cards.
The first container is signed with NXP keys and is authenticated by the ELE ROM,
while the other containers are signed with OEM keys.
AHAB Boot Flow
In single boot mode, the Cortex-A55 ROM reads data from the selected boot
device, loading all containers in the chosen boot image set one by one. All
images within each container (e.g., EdgeLock secure enclave firmware, Cortex-M33
firmware, A55 firmware, OP-TEE, and U-Boot) are loaded, and the EdgeLock secure
enclave (ELE) is tasked with authenticating them. The ELE firmware is
authenticated by the ELE ROM, and images in the second container are verified by
the ELE firmware.
If the bootloader image contains more than two containers, the third and
subsequent containers are authenticated by the SPL instead of the ELE.
PKI Generation
To authenticate the bootloader, we need to generate keys. These keys can be
created with the CST. The private key will be used to sign the bootloader, and
the public key will be burned into the i.MX93 fuses to authenticate the
bootloader during boot.
Follow these steps to generate the keys:
cd cst-3.4.1/keys
echo 00000001 > serial
Write the passphrase for the certificate (replace "fooahabcert" with your
choice) in two lines, separated by \n. It is important to store this
passphrase securely with backups:
echo -e "fooahabcert\nfooahabcert" > key_pass.txt
Generate a P384 ECC PKI tree with a subordinate SGK key on CST:
./ahab_pki_tree.sh
[...]
Do you want to use an existing CA key (y/n)?: n

Key type options (confirm targeted device supports desired key type):
Select the key type (possible values: rsa, rsa-pss, ecc)?: ecc
Enter length for elliptic curve to be used for PKI tree:
Possible values p256, p384, p521:  p384
Enter the digest algorithm to use: sha384
Enter PKI tree duration (years): 10
Do you want the SRK certificates to have the CA flag set? (y/n)?: n
Generate the Signing Root Keys (SRK) Table and SRK Hash for 64-bit Linux machines:
cd ../crts/
../linux64/bin/srktool -a -d sha256 -s sha384 -t SRK_1_2_3_4_table.bin \
    -e SRK_1_2_3_4_fuse.bin -f 1 -c \
    SRK1_sha384_secp384r1_v3_usr_crt.pem,\
    SRK2_sha384_secp384r1_v3_usr_crt.pem,\
    SRK3_sha384_secp384r1_v3_usr_crt.pem,\
    SRK4_sha384_secp384r1_v3_usr_crt.pem
Do not enter spaces between the commas when specifying the SRKs in the "-c" or
"--certs" option. Otherwise, the certificates specified after the first space
will be excluded from the table.
Regenerate the SRK HASH (SRK_1_2_3_4_fuse.bin) using SHA256 with the
SRK_1_2_3_4_table.bin:
openssl dgst -binary -sha256 SRK_1_2_3_4_table.bin
Optionally, verify that the sha256sum of SRK_1_2_3_4_table matches the SRK_1_2_3_4_fuse.bin:
od -t x4 SRK_1_2_3_4_fuse.bin
0000000 29eec727 eaed9aa7 c7e53bc0 36835f78
0000020 6901bc47 b244753c f78d3162 27ae36b9
0000040
Bootloader Signature
The CST uses CSF description files to sign (and encrypt) containers generated by
imx-mkimage with OEM keys. When imx-mkimage generates containers, it also
specifies the block offsets to be used in the CSF description files. For
example, imx-mkimage returns the following values for your bootloader:
CST: CONTAINER 0 offset: 0x0
CST: CONTAINER 0: Signature Block: offset is at 0x190
CST: CONTAINER 0 offset: 0x400
CST: CONTAINER 0: Signature Block: offset is at 0x490
Where 0x190 is the block offset for the second container header and 0x490 is
the block offset for the third container header.
The CSF description file used to sign a container contains three sections:
- [Header]: Information about the HAB version to use for signing.
- [Authenticate Data]: Information about the key used to sign.
- [Install SRK]: Information about the container being signed.
The following CSF description files were used to sign the
u-boot-atf-container.img in our example:
[Header]
Target = AHAB
Version = 1.0

[Install SRK]
# SRK table generated by srktool
File = "SRK_1_2_3_4_table.bin"
# Public key certificate in PEM format
Source = "SRK1_sha384_secp384r1_v3_usr_crt.pem"
# Index of the public key certificate within the SRK table (0 .. 3)
Source index = 0
# Type of SRK set (NXP or OEM)
Source set = OEM
# bitmask of the revoked SRKs
Revocations = 0x0

[Authenticate Data]
# Binary to be signed generated by mkimage
File = "u-boot-atf-container.img"
# Offsets = Container header  Signature block (printed out by mkimage)
Offsets = 0x0 0x190
The following CSF description files were used to sign flash.bin in our
example:
[Header]
Target = AHAB
Version = 1.0

[Install SRK]
# SRK table generated by srktool
File = "SRK_1_2_3_4_table.bin"
# Public key certificate in PEM format
Source = "SRK1_sha384_secp384r1_v3_usr_crt.pem"
# Index of the public key certificate within the SRK table (0 .. 3)
Source index = 0
# Type of SRK set (NXP or OEM)
Source set = OEM
# bitmask of the revoked SRKs
Revocations = 0x0

[Authenticate Data]
# Binary to be signed generated by mkimage
File = "flash.bin"
# Offsets = Container header  Signature block (printed out by mkimage)
Offsets = 0x400 0x490
The first step is to generate a u-boot-atf-container.img, then copy the block
offsets into the CSF description file to sign it:
make SOC=iMX9 REV=A1 dtbs=imx93-11x11-evk.dtb u-boot-atf-container.img
Next, sign it with the following command and replace the unsigned version:
cst -i u-boot-atf-container.img.csf -o u-boot-atf-container.img.signed
mv u-boot-atf-container.img.signed u-boot-atf-container.img
Then generate a flash.bin containing the signed u-boot-atf-container.img:
make SOC=iMX9 REV=A1 V2X=NO dtbs=imx93-11x11-evk.dtb flash_singleboot
Finally, sign the resulting flash.bin:
cst -i flash.bin.csf -o flash.bin.signed
Burn Fuses
Once the signed flash.bin is flashed, you need to burn the public keys used to
sign the bootloader into the i.MX93 fuses to finalize AHAB secure boot. This
requires using a U-Boot that provides AHAB functionalities, such as checking ELE
events during bootloader authentication and securing the device.
Program SRK
The following commands enable AHAB secure boot by programming the
SRK_HASH[255:0] fuses on i.MX93, ensuring that only bootloaders signed with
keys matching the SRK hash programmed into the fuses will be accepted:
fuse prog -y 16 0 0x29eec727
fuse prog -y 16 1 0xeaed9aa7
fuse prog -y 16 2 0xc7e53bc0
fuse prog -y 16 3 0x36835f78
fuse prog -y 16 4 0x6901bc47
fuse prog -y 16 5 0xb244753c
fuse prog -y 16 6 0xf78d3162
fuse prog -y 16 7 0x27ae36b9
Close the Device
Once the SRK fuses are programmed, you can "close" the device to allow only the
bootloader signed with keys matching the SRK table to boot:
Before closing the device, you can verify that the fuses have been written
correctly by checking that no ELE events are raised:
ahab_status
Lifecycle: 0x00000008, OEM Open

No Events Found!
=>
Lifecycle: 0x00000008, OEM Open

No Events Found!
Once the device is closed, the ahab_status command will show OEM closed:
ahab_status
Lifecycle: 0x00000020, OEM closed

No Events Found!
=>
Lifecycle: 0x00000020, OEM closed
No Events Found!
As long as OEM Open appears in the status, the device is not secured and can still
execute unsigned bootloaders or those signed with invalid keys.
Conclusion
By implementing AHAB on the i.MX93 platform, you can ensure that your boot
process is protected from unauthorized code. The use of public key cryptography
and secure containers adds an extra layer of security, making your device more
resilient to attacks. This process is crucial for applications where integrity
and authenticity from the very first boot stage are paramount.
Introduction
The goal of the Zephyr project, hosted by the Linux foundation, since 2016, is to provide a safe and secured real time operating system (RTOS) for connected devices that are too small for Linux, or for core companion, through the Apache 2.0 open source license.
It is designed for resource-constrained devices such as microcontrollers and Internet of Things (IoT) devices, to be modular and scalable. This makes it ideal for a wide range of devices, from simple sensors to complex systems. The operating system is written in C and is fully compatible with the C11 and C++17 standards.
One of the key benefits of the Zephyr device model is its small footprint, it can be configured to run on devices with as little as 10 KB of memory.
It supports multiple 32 bits and 64 bits architectures: Cortex-A, Cortex-M, Cortex-R, RISC-V, x86-64, etc.
But it also support several boards and extensions: Feather, nRF52840, ST Discovery, ST Nucleo, ESP-32, etc.
It is able to manage several kinds of connectivity: Bluetooth, ethernet, wifi, LoRa.
And it support some network protocols: IPv4, IPv6,UDP, TCP, CoAP, LWM2M, MQTT, DNS, etc.
As Linux, Zephyr use Kconfig, and its device model is mainly based on device tree.
Device tree
Device trees are tree data structures that describe the hardware components and their relationships in a system.
They are stored in a text file, named device tree sources (*.dts), and they written by developers to describe hardware architectures of SoCs and boards.
And they are used by the operating system to determine how to initialize and interact with the hardware.
Each node describe a device of the system, has its own properties that describe their characteristics, and they have only one parent (except for the root node).
Each device driver is associated with a specific device tree node, which represents a hardware component in the system. The device driver provides the necessary code and data to control the behavior of the hardware component.
test_i2c_bme280: bme280@6 {
        compatible = "bosch,bme280";
        reg = <0x6>;
};
In the Linux kernel, device tree sources are compiled to device tree binaries (dtb) that are parsed, at boot, by bootloader stages (U-Boot, TF-A...) and the kernel to allow support several hardware configuration with same binaries.
But in Zephyr, device tree sources are transformed to a "devicetree_generated.h" C header file at build, that contains macro definitions and data structures allowing device drivers to access information about the hardware components in the system, such as the memory mapping of a device, its pin assignments, and its IRQ numbers:
#define DT_COMPAT_HAS_OKAY_bosch_bme280 1
#define DT_N_INST_bosch_bme280_NUM_OKAY 1
#define DT_FOREACH_OKAY_bosch_bme280(fn) fn(DT_N_S_soc_S_i2c_40005400_S_bme280_77)
#define DT_FOREACH_OKAY_VARGS_bosch_bme280(fn, ...) fn(DT_N_S_soc_S_i2c_40005400_S_bme280_77, __VA_ARGS__)
#define DT_FOREACH_OKAY_INST_bosch_bme280(fn) fn(0)
#define DT_FOREACH_OKAY_INST_VARGS_bosch_bme280(fn, ...) fn(0, __VA_ARGS__)
#define DT_COMPAT_bosch_bme280_BUS_i2c 1
Where:
- DT_COMPAT_HAS_OKAY_bosch_bme280: indicates that there is at least one instance of BME280
- DT_N_INST_bosch_bme280_NUM_OKAY: defines the number of BME280 instances that are marked okay
- DT_FOREACH_OKAY_bosch_bme280: allows you to apply a function fn to each instance of the BME280
- DT_FOREACH_OKAY_VARGS_bosch_bme280: also allows you to apply a function fn to each instance of the BME280, but with additional arguments
- DT_FOREACH_OKAY_INST_bosch_bme280: allows you to apply a function fn to each instance of the BME280, passing the instance number as an argument
- DT_FOREACH_OKAY_INST_VARGS_bosch_bme280: is similar to the previous macro, but this one allows for additional arguments
- DT_COMPAT_bosch_bme280_BUS_i2c: indicates that the BME280 device is connected to an I2C bus.
- DT_N_S_soc_S_i2c_40005400_S_bme280_77: refers to a specific node in the device tree, here it refers to the BME280 sensor connected to the I2C controller with the base address 0x40005400 within the SoC. The sensor's address on this I2C bus is 0x77.
In addition, device tree sources can be extended or overridden, for example to connect additional devices to a board, or to disable board devices which will not be used:
/ {
        aliases {
                bme280 = &bme280;
        };
};

&spi1 {
        status = "disabled";
};

&i2c1 {
        status = "okay";
        bme280: bme280@77 {
                compatible = "bosch,bme280";
                reg = <0x77>;
        };
};
Binding
Content of device tree sources is described in binding files, that are written in human readable and easy to parse YAML.
Binding files can be also used to validate device tree sources by comparing the information in the YAML file with the information in the device tree sources.
description: BME280 integrated environmental sensor

compatible: "bosch,bme280"

include: [sensor-device.yaml, i2c-device.yaml]
Device driver
In Zephyr, a device driver can access the properties of an associated node in the device tree using the macro that are defined in C header files.
For example, the following code can be used to initialize a BME280 sensor using properties defined in the device tree:
#include <device.h>
#include <drivers/i2c.h>
#include <devicetree.h>
#include <zephyr.h>

// Define the node identifier for the BME280 sensor
#define BME280_NODE DT_N_S_soc_S_i2c_40005400_S_bme280_77

// Function to initialize the BME280 sensor
static int bme280_init(const struct device *dev)
{
    // Check if the node is available
    if (!device_is_ready(dev)) {
        printk("Device %s is not ready\n", dev->name);
        return -ENODEV;
    }

    // Retrieve the I2C device associated with the BME280 node
    const struct device *i2c_dev = DEVICE_DT_GET(DT_BUS(BME280_NODE));

    if (!device_is_ready(i2c_dev)) {
        printk("I2C device not ready\n");
        return -ENODEV;
    }

    // Write some initialization code here, such as configuring registers

    printk("BME280 sensor initialized\n");
    return 0;
}

// Initialize the BME280 sensor at boot time
SYS_INIT(bme280_init, APPLICATION, CONFIG_APPLICATION_INIT_PRIORITY);
Conclusion
Those who have already implemented BSP or driver on Linux shouldn't encounter too much difficulty, but on the other hand, the step is a little higher for people coming from the world of micro-controllers.
Introduction
Since some years, I haven't built an embedded Linux without using a framework, like Open Embedded from the Yocto
project.
Then here, I wanted to make a guide to help you to build quickly, from "scratch" a very minimal embedded Linux to boot a
target.
The following examples have been written to boot a virtual Qemu target but, they can be adapted to boot a real target.
Moreover, the build environment will be bootstrapped with a prebuilt cross-toolchain, I have chosen to use one provided
by Bootlin and using glibc.
Setup the environment
First, it is required to install the packages that are needed to install and use the cross-toolchain but also to compile the host tools and to provide Qemu:
- The Ncurses libraries are only required to execute the command make menuconfig.
- The certificates and wget will be used to download the prebuilt toolchain.
- In the same way, git will be used to checkout the source of Busybox and Linux.
- The Qemu packages will be used to emulate system platform and to execute static binaries cross-compiled for aarch64 on the x86-64 host.
apt update
apt install -y --no-install-recommends \
    bc \
    build-essential \
    ca-certificates \
    cpio \
    file \
    flex \
    git \
    ipxe-qemu \
    libncurses5-dev \
    libncursesw5-dev \
    libssl-dev \
    qemu \
    qemu-system-aarch64 \
    qemu-user-static \
    wget
Now, it is time to download and install the prebuilt toolchain:
mkdir ~/src
cd ~/src
wget https://toolchains.bootlin.com/downloads/releases/toolchains/aarch64/tarballs/aarch64--glibc--stable-2020.08-1.tar.bz2
tar xvjf aarch64--glibc--stable-2020.08-1.tar.bz2
Once the toolchain has been extracted you have to set the required environment variables to cross-compile binaries:
- PATH: It shall be extended so that the cross-tools from the cross-toolchain will be available from the environment
- CROSS_COMPILE: In order to clarify the prefix used by the cross-tools
- ARCH: The architecture of the target platform
ls ~/src/aarch64--glibc--stable-2020.08-1/bin/*gcc
~/src/aarch64--glibc--stable-2020.08-1/bin/aarch64-linux-gcc

export PATH=~/src/aarch64--glibc--stable-2020.08-1/bin:$PATH
export CROSS_COMPILE=aarch64-linux-
Now, it is possible to call the cross-tools from the shell:
aarch64-linux-gcc -v
Using built-in specs.
COLLECT_GCC=~/src/aarch64--glibc--stable-2020.08-1/bin/aarch64-linux-gcc.br_real
COLLECT_LTO_WRAPPER=~/src/aarch64--glibc--stable-2020.08-1/bin/../libexec/gcc/aarch64-buildroot-linux-gnu/9.3.0/lto-wrapper
Target: aarch64-buildroot-linux-gnu
<...>
Thread model: posix
gcc version 9.3.0 (Buildroot 2020.08-14-ge5a2a90)
Concerning the variable PATH this one will be set afterwards because its value depends on the binary that will be built.
Build the Linux kernel
So, the environment is ready to pull the sources of the latest stable branch of the kernel Linux and to build them:
git clone git://git.kernel.org/pub/scm/linux/kernel/git/stable/linux.git
cd linux
git checkout -b local/linux-5.4.y origin/linux-5.4.y
# git show HEAD

export ARCH=arm64

make defconfig
  HOSTCC  scripts/basic/fixdep
  HOSTCC  scripts/kconfig/conf.o
  HOSTCC  scripts/kconfig/confdata.o
  HOSTCC  scripts/kconfig/expr.o
  LEX     scripts/kconfig/lexer.lex.c
  YACC    scripts/kconfig/parser.tab.[ch]
  HOSTCC  scripts/kconfig/lexer.lex.o
  HOSTCC  scripts/kconfig/parser.tab.o
  HOSTCC  scripts/kconfig/preprocess.o
  HOSTCC  scripts/kconfig/symbol.o
  HOSTLD  scripts/kconfig/conf
*** Default configuration is based on 'defconfig'
#
# configuration written to .config
#

# make menuconfig

make -j$(nproc)
  <...>
  AR      drivers/net/ethernet/built-in.a
  AR      drivers/net/built-in.a
  AR      drivers/built-in.a
  GEN     .version
  CHK     include/generated/compile.h
  LD      vmlinux.o
  MODPOST vmlinux.o
  MODINFO modules.builtin.modinfo
  LD      .tmp_vmlinux.kallsyms1
  KSYM    .tmp_vmlinux.kallsyms1.o
  LD      .tmp_vmlinux.kallsyms2
  KSYM    .tmp_vmlinux.kallsyms2.o
  LD      vmlinux
  SORTEX  vmlinux
  SYSMAP  System.map
  Building modules, stage 2.
  MODPOST 531 modules
  OBJCOPY arch/arm64/boot/Image
  GZIP    arch/arm64/boot/Image.gz
The command make defconfig will apply the default configuration for the target platform (cf. ARCH=arm64), and the
compilation will be performed by make -j$(nproc).
The commands git show HEAD and make defconfig are optional:
- the first is useful to verify that the latest commit corresponding to the latest tag of the branch linux-5.4.y.
- the second can be used if you want to customize the kernel configuration.
NB. The kernel Linux but also Busybox and some projects use Kbuild to manage the build options
Populate the sysroot
The easy way to bootstrap a sysroot is to use Busybox that has been created to offer common UNIX tools into a single
executable and it is size-optimized. To create a sysroot, it is only required to add a few configuration files.
The steps to pull and build Busybox are similar to those of the kernel Linux.
git clone git://git.busybox.net/busybox
cd busybox
git checkout -b local/1_32_stable origin/1_32_stable
# git show HEAD

export ARCH=aarch64
export LDFLAGS="--static"

make defconfig
# make menuconfig
make -j$(nproc)

make install
Here, the LDFLAGS is set to force static linking of Busybox quickly, but it is also possible to use
make menuconfig to set CONFIG_STATIC=y. The advantage of the static executable is that it can be tested with Qemu:
qemu-aarch64-static busybox echo "Hello!"
Hello!
qemu-aarch64-static busybox date
Sat Jun 27 15:06:41 UTC 2020
The binary qemu-aarch64-static allows to execute a binary built for another architecture on the host computer, for
example here it allows to execute the Busybox binary compiled for an aarch64 target on a x86-64 host.
The last command make install created a tree into the _install directory that can be used to populate the sysroot:
ls -l _install
total 4
drwxr-xr-x. 1 tperrot tperrot 974 Nov 30 15:22 bin
lrwxrwxrwx. 1 tperrot tperrot  11 Nov 30 15:22 linuxrc -> bin/busybox
drwxr-xr-x. 1 tperrot tperrot 986 Nov 30 15:22 sbin
drwxr-xr-x. 1 tperrot tperrot  14 Nov 30 15:22 usr

ls -l _install/bin
<...>
lrwxrwxrwx. 1 tperrot tperrot       7 Nov 30 15:22 umount -> busybox
lrwxrwxrwx. 1 tperrot tperrot       7 Nov 30 15:22 uname -> busybox
lrwxrwxrwx. 1 tperrot tperrot       7 Nov 30 15:22 usleep -> busybox
lrwxrwxrwx. 1 tperrot tperrot       7 Nov 30 15:22 vi -> busybox
lrwxrwxrwx. 1 tperrot tperrot       7 Nov 30 15:22 watch -> busybox
lrwxrwxrwx. 1 tperrot tperrot       7 Nov 30 15:22 zcat -> busybox
In order, to finalize this minimal sysroot, it is required to create a rcS init script:
mkdir _install/proc _install/sys _install/dev _install/etc _install/etc/init.d
cat > _install/etc/init.d/rcS << EOF
#!/bin/sh
mount -t proc none /proc
mount -t sysfs none /sys
/sbin/mdev -s
[ ! -h /etc/mtab ]  && ln -s /proc/mounts /etc/mtab
[ ! -f /etc/resolv.conf ] && cat /proc/net/pnp > /etc/resolv.conf
EOF
chmod +x _install/etc/init.d/rcS
Build the filesystem
The target of this step is to package the sysroot tree into a filesystem that can be mounted by the kernel.
There is two available possibilities, either build a ramfs or a rootfs.
Globally, the difference between both is that:
- the ramfs is a very simple filesystem that can be used by the kernel to create a block device into the RAM space from an archive.
- the rootfs is a filesystem mounted from a non volatile device by the kernel.
For more information about the difference between the ramfs and the rootfs, you can you refer to the kernel documentation.
Build a ramfs
To build the ramfs we will use cpio and gzip to construct the compressed archive after modifying the rights:
mkdir _rootfs
rsync -a _install/ _rootfs
chown -R root:root _rootfs
cd _rootfs
find . | cpio -o --format=newc > ../rootfs.cpio
cd ..
gzip -c rootfs.cpio > rootfs.cpio.gz
Build a rootfs
To build the rootfs, the first step is to create an empty binary blob that will be mounted into a loop device to be
formatted to create a ext3 filesystem. Then the tree can be copied and the rights updated.
dd if=/dev/zero of=rootfs.img bs=1M count=10
mke2fs -j rootfs.img
mkdir _rootfs
mount -o loop rootfs.img _rootfs
rsync -a _install/ _rootfs
chown -R root:root _rootfs
sync
umount _rootfs
Boot the target
Following, the qemu commands to boot the minimal embedded Linux system that has been built.
# With the ramfs
qemu-system-aarch64 -nographic -no-reboot -machine virt -cpu cortex-a57 -smp 2 -m 256 \
    -kernel ~/src/linux/arch/arm64/boot/Image \
    -initrd ~/src/busybox/rootfs.cpio.gz \
    -append "panic=5 ro ip=dhcp root=/dev/ram rdinit=/sbin/init"

# With the rootfs
qemu-system-aarch64 -nographic -no-reboot -machine virt -cpu cortex-a57 -smp 2 -m 256 \
    -kernel ~/src/linux/arch/arm64/boot/Image \
    -append "panic=5 ro ip=dhcp root=/dev/vda" \
    -drive file=~/src/busybox/rootfs.img,format=raw,if=none,id=hd0 -device virtio-blk-device,drive=hd0
Then the target will be boot to shell, "It's alive!":
[    0.000000] Booting Linux on physical CPU 0x0000000000 [0x411fd070]
[    0.000000] Linux version 5.10.0-rc5 (tperrot@27ea4a863f61) (aarch64-linux-gcc.br_real (Buildroot 2020.08-14-ge5a2a90) 9.3.0, GNU ld (GNU Binutils) 2.33.1) #1 SMP PREEMPT Mon Nov 30 14:40:05 UTC 2020
[    0.000000] Machine model: linux,dummy-virt
<...>
[    0.858346] Sending DHCP requests ., OK
[    0.870558] IP-Config: Got DHCP answer from 10.0.2.2, my address is 10.0.2.15
[    0.870909] IP-Config: Complete:
[    0.871199]      device=eth0, hwaddr=52:54:00:12:34:56, ipaddr=10.0.2.15, mask=255.255.255.0, gw=10.0.2.2
[    0.871566]      host=10.0.2.15, domain=, nis-domain=(none)
[    0.871825]      bootserver=10.0.2.2, rootserver=10.0.2.2, rootpath=
[    0.871866]      nameserver0=10.0.2.3
[    0.872389]
[    0.875863] ALSA device list:
[    0.876151]   No soundcards found.
[    0.879353] uart-pl011 9000000.pl011: no DMA platform data
[    0.920237] Freeing unused kernel memory: 5952K
[    0.921223] Run /sbin/init as init process

Please press Enter to activate this console.