Introduction
The previous two articles on this blog — one on cycle-level
optimization, one on the no-heap ECS underneath it — were both about the Game Boy
Advance: an FPU-less CPU with no hardware polygon fill at all, where
every trick is about avoiding soft-float calls and touching as few VRAM
bytes as possible. The Nintendo DS backend in framer-engine
is the opposite kind of retro target — it has a real fixed-function 3D
GPU, with hardware transform, lighting, and rasterization. That sounds
like it should make lighting the easy part. It doesn't. It just moves
the constraint from "the CPU can't do float math" to "the GPU can't do
the thing you're asking it to do, and it won't tell you that — it'll just
render something else instead."
This article is about chasing exactly that down: a real rendering bug, a
real hardware surprise straight out of GBATEK, and a fix that gets
meaningfully closer to real point-light falloff without ever abandoning
the GPU's own lighting hardware for a software fallback.
Note
framer-engine is a personal side project. The source code will be
made publicly available once the engine reaches a sufficient level of
maturity.
The hardware constraint that drives everything
Every light in framer-engine — directional, point, or spot — is the same
struct light component, and every backend (GBA's software rasterizer,
desktop OpenGL/Vulkan/software, and this one) is expected to shade point
lights with real distance falloff: the closer an object is, the brighter
it gets, fading to nothing at the light's configured range. The DS's own
hardware lighting docs rule that out before any code gets written.
libnds's glLight():
void glLight(int id, rgb color, v10 x, v10 y, v10 z)
Only parallel light sources are supported on the DS
Four hardware light slots, each one a color and a direction vector — no
position, no range, no falloff term anywhere in the API. The DS's GPU
computes real per-vertex Lambertian shading (N·L) against those four
directions entirely in fixed-function hardware, at zero CPU cost per
triangle — genuinely excellent, for a directional light. A point light,
on this hardware, can only ever be an approximation: pick a direction,
accept that "distance" isn't a thing the lighting unit knows about, and
find whatever ways are still available to make that approximation better
without leaving hardware lighting behind entirely for a per-vertex
CPU-side shading pass (which the DS's ARM946E-S can do, but which throws
away the entire reason to use the GPU's fixed-function path in the first
place).
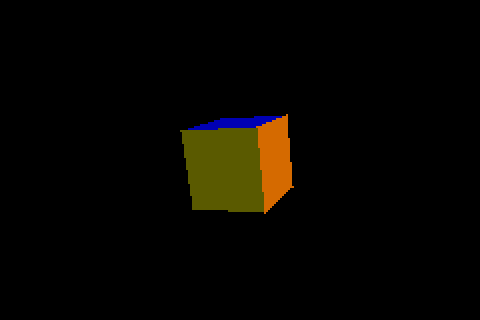
Bug 1: an ambient floor that was zero on purpose
Before any of the point-light work, the hardware 3D path had a simpler
problem: GL_AMBIENT — the DS's material property for "the color when
a face isn't catching any light at all" — was set to black,
unconditionally, the instant any Light entity existed in the scene:
/* what shipped, briefly */
glMaterialf(GL_AMBIENT, RGB15(0, 0, 0));
glLight() only lights a face whose normal faces toward one of the
four active directions — anything else gets zero contribution from
diffuse, and with GL_AMBIENT pinned to black, zero contribution from
ambient too. The result: any face pointing away from every active light
rendered as pure, flat black, on hardware that was otherwise correctly
shading everything facing the right way. The fix looked simple —
accumulate every ambient/directional light's color into a running sum
each frame, and feed that into GL_AMBIENT instead of a hardcoded
zero:
s_ambient_r += gl->r;
s_ambient_g += gl->g;
s_ambient_b += gl->b;
/* ...clamped to 1.0 after the loop, then: */
glMaterialf(GL_AMBIENT,
    RGB15((int)(r * s_ambient_r * 31.0f), /* ...g, b... */));
It rendered correctly with exactly one active light. It did not render
correctly with two.
The hardware surprise: ambient is summed once per active light
Adding a second point light to the scene — the natural next step, since
the whole point of this work was to support more than one — turned every
previously-correctly-shaded face white. Not brighter: blown-out,
clipped-to-white white, on geometry that had looked exactly right a
commit earlier.
The cause is in GBATEK's own description of the DS's polygon lighting
equation, easy to miss because nothing in libnds's glMaterialf() doc
comment mentions it: the hardware doesn't compute MaterialAmbient
once and add it to the final result. It computes MaterialAmbient ×
LightColor, separately, for every currently active light, and sums
those. Diffuse and specular are supposed to work that way — that's how
multiple colored lights are meant to combine — but ambient, conceptually,
is "the floor when nothing is lighting this face," and nothing about that
concept should scale with how many lights happen to be turned on. The DS
hardware doesn't make that distinction. Set GL_AMBIENT to the value
you actually want as a floor, and with three active lights, the hardware
hands you back three times that, added into every face's final color.
The first attempted fix was the obvious one: divide by the number of
active lights before setting GL_AMBIENT, so the hardware's own
summation would reconstruct roughly the intended value.
/* looked right, wasn't */
float ambient_scale = 1.0f / (float)s_num_lights;
This fixed the two-point-light overexposure. It also made a sphere lit by
one dim ambient light and two much brighter colored point lights render
far too dark — because a flat 1/N correction has no way to know that
those three active lights aren't equally bright. It divides down a lone
dim ambient contribution by exactly as much as it divides down two point
lights that have nothing to do with the ambient floor at all. A cube's
few flat faces happened to look fine anyway (whichever face caught a
point light's direction was still bright from diffuse); a sphere's curved
surface — mostly not facing any of the three light directions — was
left with almost nothing but that over-divided ambient term, and rendered
close to black again, just from a different arithmetic mistake than
bug 1.
The actual fix reconstructs the target ambient exactly, not
approximately: track the real per-channel sum of every active light's own
color (not just the count of lights), and divide by that instead.
/* MaterialAmbient * sum(LightColor) == target once hardware sums it
 * back, regardless of how many lights are active or how bright any
 * one of them is. */
float ambient_scale_r = 1.0f / fmaxf(s_light_color_sum_r, 0.05f);
glMaterialf(GL_AMBIENT,
    RGB15((int)(r * amb_r * ambient_scale_r * 31.0f), /* ...g, b... */));
Since MaterialAmbient × sum(LightColor) is exactly what the hardware
computes internally, setting MaterialAmbient = target / sum(LightColor)
makes the hardware's own summation land back on target — no matter
how many lights are active or how differently bright each one is. The
fmaxf(..., 0.05f) floor matters for a real edge case this reasoning
otherwise misses entirely: if every active light has an exact 0 in
one color channel (a pure-hue light, easy to reach — a pure green point
light has no red or blue component at all), the sum for that channel is
genuinely zero, and no MaterialAmbient value can make hardware
produce a nonzero result by multiplying against a color that has none.
Flooring the divisor doesn't fully fix that case — the DS hardware
mathematically cannot recover a floor for a channel no active light
contributes to — but it keeps the reconstruction from returning inf
and cascading into garbage the moment a scene reaches for a light whose
color isn't already a happy accident of "has something in every channel."
RGB555 has an opinion about how bright "bright enough" is
With the arithmetic fixed, faces pointing away from every light were no
longer wrong — just still visually indistinguishable from unlit black
in a real screenshot. RGB555 gives each channel 5 bits, 32 steps; a first
ambient floor of 0.18 on a 0.8-albedo material works out to roughly
0.8 * 0.18 * 31 ≈ 4/31 — technically nonzero, comfortably lost to
ordinary display gamma and contrast. Raising the floor to 0.45 reaches
roughly 11/31, about 35%: the difference between "the math is
correct" and "a person looking at the screen can tell the math is
correct." Getting the equation right and getting the number right turned
out to be two separate bugs, not one.
Real per-object falloff, without leaving hardware lighting
With the ambient floor actually behaving, the remaining problem was the
one this article opened with: point lights, as hardware directional
lights, weren't just "no falloff" in the abstract — the direction itself
was computed once per frame, not per object, from the world origin:
/* once per frame, not once per object */
float lx = gl->x, ly = gl->y, lz = gl->z; /* the light's position */
/* ...normalize (lx, ly, lz) as a direction from the origin... */
glLight(s_num_lights, hw_color, dx, dy, dz);
Every object in the scene, regardless of where it actually sat relative
to that light, saw the identical direction and the identical brightness,
with no falloff at all. A "point" light behaved exactly like a directional one
from every single object's point of view — which is a stronger
regression than the hardware's own real limitation demands. The DS
genuinely cannot do per-pixel or per-vertex-across-one-object falloff
for a point light; it can absolutely do a different, correct direction
and brightness for each separate object, if something recomputes those
per object instead of once for the whole frame.
That's the fix: move the glLight() upload from once-per-frame to
once-per-object, called right before that object's own triangles submit,
computing real direction and falloff from that object's actual world
position:
static void nds_upload_lights_for_object(const float pos[3])
{
    for (int i = 0; i < s_num_lights; i++) {
        /* ...ambient/directional lights reuse the once-per-frame
         * direction/color computed earlier -- no position to react
         * to, so recomputing per object would be pure waste... */
        float lx = gl->x - pos[0], ly = gl->y - pos[1], lz = gl->z - pos[2];
        float d2 = lx * lx + ly * ly + lz * lz;
        float atten = 1.0f - d2 * gl->inv_range2; /* same falloff every backend uses */
        /* ...clamp atten to [0, 1], normalize (lx, ly, lz), scale color by atten... */
        glLight(i, hw_color, dx, dy, dz);
    }
}
An object near the light now renders bright; an object near the edge of
its range renders dim; an object outside the range entirely gets nothing
from it — a real approximation of point-light falloff, per object,
running through the exact same hardware N·L diffuse calculation the
GPU always did. Nothing about the triangle count, vertex count, or
rasterization work changes even slightly — this only changes the
values written into two hardware registers that were already being
written once per object either way.
It isn't free in the sense of costing literally zero CPU cycles — a
point light's direction still needs a square root to normalize, and that
now happens once per (point light, object) pair instead of once per
frame. But it's the same fixed-point sqrtf32/divf32 primitives
this code already used for the once-per-frame version, on a scene with a
handful of lights and a handful of objects — a few extra fixed-point
operations, not a new soft-float cost, and not one more vertex for the
GPU to transform or one more pixel for it to fill. Against the cost of
submitting an object's actual geometry at all, it doesn't move the
needle, which is the only sense of "free" that was ever on the table for
a change like this.
Two smaller wins that came out of the same pass
Two more things fell out of looking this closely at the hardware
lighting path, neither one changing a single triangle:
GL_ANTIALIAS was already enabled at startup, and doing about half of
its job. The DS only blends an edge under antialiasing where the polygon
ID changes across it — and every object in the scene defaulted to the
same ID (0), so hardware edge smoothing only ever applied where an
object's silhouette met the background. Two overlapping objects, sharing
the same ID, got a hard edge between them regardless. Assigning each
object its own ID (an index mod 63, since glClearPolyID(63) reserves
63 for the backdrop) makes that blending apply between objects too — a
different bitmask, OR'd into a glPolyFmt() call that already happens
once per object, at the same cost as before.
And the built-in sphere/cone mesh, generated at 12 sectors × 6 stacks
(120 triangles), was sized for a target this GPU isn't. That segment
count lives in a comment noting the DS's real per-frame budget is "on the
order of a couple thousand polygons" — a 360-triangle sphere at 20×10 is
still a rounding error against that, and visibly rounder on screen, for a
target whose real constraint was never triangle count in the first
place.
Update: the tessellation win had a hidden cost
That "visibly rounder on screen" sphere from the section above had a
cost this article didn't account for at the time. examples/lighting
quietly ran at exactly 30fps on real NDS timing (melonDS) rather than
60, and the cause traced straight back to this same pass.
nds_submit_tri() — the function issuing each triangle's vertices —
was also where every triangle's GL_AMBIENT/GL_DIFFUSE material
state got (re)computed, including the full ambient-reconstruction
division this article spent three sections on above. For a single-color
object that's pure waste: the material state is identical across every
one of an object's triangles, so it only ever needs setting once per
object, not once per triangle. A 12×6 (120-triangle) sphere issued 120
redundant glMaterialf() pairs into the GX FIFO every frame even
before this article's own change; the same sphere at 20×10 (360
triangles, the tessellation bump described above) issued 360. Combined
with the lighting example's four active lights — each one re-triggering
that same reconstruction math on every single one of those calls — frame
time crept just past one VBlank period.
swiWaitForVBlank() doesn't degrade gracefully when that happens. It
waits for the next VBlank interrupt after the frame's work completes,
full stop — there's no "a little late" state between VBlanks, only "made
it" or "missed it and now wait for the one after." Missing a single
VBlank by any margin, even a fraction of a scanline's worth of GX FIFO
backlog, halves the observed frame rate outright: 60fps to exactly
30fps, not 59 or 58. The tessellation bump didn't cause a gradual
slowdown that could be spotted incrementally — it silently sat under the
VBlank deadline until it didn't, and the frame rate cut itself exactly
in half the moment it crossed.
The fix has nothing to do with tessellation, lighting, or the ambient
math itself — all of that stays correct, unchanged. It's purely a matter
of when the material state gets written: once per object (or once per
face, only for the rare object whose faces genuinely have different
colors), immediately before that object's triangles submit, instead of
redundantly with every single triangle. The exact same
GL_AMBIENT/GL_DIFFUSE values land on the GPU either way — this
changes nothing about what gets drawn, only how many times the identical
FIFO command gets issued to say so.
This doesn't extend to the GBA backend: its software rasterizer computes
each face's final color directly in gba_lit_color_face(), with no
separate material/normal GPU state to redundantly reissue in the first
place — there's no equivalent waste to hoist out over there.
Confirmed on real timing (melonDS): back to a solid 60fps. The
underlying shape of the bug is the same one this whole article is
about — a GPU that will happily do exactly what's asked of it, at
whatever cost that actually carries, and won't warn you when two
separately reasonable changes (a rounder sphere, correct per-object
point-light falloff) compound into a cost neither one would have caused
alone.
Verifying a change with nothing to count
The GBA articles on this blog leaned on cycle_probe.py for every
claim — a deterministic emulator's own cycle counter, diffed between
frames, turning "did this help" into a yes/no number. None of that
tooling applies here, and that's not an oversight: this whole article is
about work that happens on the GPU's fixed-function pipeline, not the
ARM9's own cycles. There's no CPU-side cost to isolate with a breakpoint,
because there almost isn't one — the actual verification for this kind
of change is the build and test suite (native, GBA, and NDS cross builds,
all passing unchanged throughout), plus looking at the actual rendered
frame in melonDS to confirm the sphere in examples/lighting is now
visibly shaded by two differently-colored, differently-positioned lights
instead of one flat approximation. Different kind of hardware, different
kind of proof.
Where this goes next
The DS's fixed-function GPU has real capabilities this backend still
doesn't touch at all: hardware texture sampling from VRAM, a specular
shininess table, per-vertex fog. None of those are CPU-cost questions —
they're GPU features sitting unused, the same shape of opportunity this
article's point-light work turned out to be. The natural next piece,
given how this one went, is real diffuse texturing: the highest-value use
of hardware this backend doesn't ask anything of yet, and — if the
pattern from the ambient bug repeats — probably has its own GBATEK
surprise waiting to be found the same way this one was, by trying the
obvious thing first and actually looking at what came out the other end.
Introduction
The previous article on this blog was about
squeezing cycles out of framer-engine's GBA renderer. This one is about
something that has to be settled before any of that renderer work is
possible at all: how do you run an Entity Component System — the
architecture pattern the whole engine is built around — on a console with
32KB of fast RAM, 256KB of slow RAM, no operating system, and no
malloc() you can lean on?
framer-engine's answer is a second, much smaller ECS implementation
living behind the same interface as the desktop one. Every game-logic
line — component definitions, systems, queries — is identical between a
PC build and a GBA build. Only one file differs: which world.c gets
linked in.
Note
framer-engine is a personal side project. The source code will be
made publicly available once the engine reaches a sufficient level of
maturity.
Two ECS backends, one interface
framer-engine's default ECS backend is Flecs, a full-featured ECS used
for desktop and handheld targets with a real OS underneath (PSP, 3DS,
Switch, PC). Flecs is excellent at what it does — archetypes, queries,
observers, relationships — but all of that bookkeeping assumes a working
heap it can grow and shrink as entities and component types come and go.
That's simply not available on a target like the GBA: 32KB of IWRAM,
256KB of EWRAM, both fixed-size and fully accounted for from the moment
the ROM boots, with no MMU and no OS to page anything in. There's no heap
to assume.
Rolling a second full-featured ECS to fit that budget wasn't the
answer either — that's a lot of complexity to maintain for a problem
that doesn't need it. What GBA-class scenes actually look like is a
handful of objects (examples/simple_cube uses one mesh and a camera;
examples/spinning_shapes uses three), not thousands, and the
component types are known and fixed at compile time, not user-extensible
at runtime. That's a much smaller problem than "general-purpose ECS,"
and src/ecs/static/world.c — about 550 lines of plain C — is sized to
match it instead of to match Flecs:
/* Entities */
static bool s_alive[FRAMER_STATIC_MAX_ENTITIES];
static uint64_t s_comp_mask[FRAMER_STATIC_MAX_ENTITIES];

/* Component data store: row = component slot, column = entity slot.
 * Each entity slot is FRAMER_STATIC_MAX_COMPONENT_SIZE bytes wide. */
static uint8_t s_store[FRAMER_STATIC_MAX_COMPONENTS]
                       [FRAMER_STATIC_MAX_ENTITIES *
                        FRAMER_STATIC_MAX_COMPONENT_SIZE];
Every one of those arrays is a fixed-size global, sized by compile-time
constants. There is no framer_entity_create() call anywhere in this
file that can fail by running out of memory in some unpredictable way —
it can only fail by running out of array slots, a number known before
the program even starts.
Both backends sit behind the exact same include/framer/ecs.h —
framer_world_t, framer_component_register(), framer_query_create(),
framer_system_register(), the FRAMER_GET/FRAMER_SET/FRAMER_FIELD
macros. A component defined with FRAMER_COMPONENT_DEFINE(Velocity) and
a system registered with framer_system_register() compiles and runs
unchanged on either backend; which one a build gets is a single Meson
option, -Decs=flecs or -Decs=static, and GBA's cross file pins it
to static (Flecs needs an OS, and bare-metal GBA doesn't have one) —
the build refuses to configure any other way for that target.
Entities are array slots, nothing more
An entity in this backend isn't an object — it's a 1-based index into
those parallel arrays. framer_entity_create() finds the lowest dead
slot and claims it, first-fit:
framer_entity_t framer_entity_create(framer_world_t *world)
{
    int i;

    for (i = 0; i < FRAMER_STATIC_MAX_ENTITIES; i++) {
        if (!s_alive[i]) {
            s_alive[i] = true;
            s_comp_mask[i] = 0;
            if (i + 1 > s_entity_high)
                s_entity_high = i + 1;
            return EID(i);
        }
    }
    return 0; /* pool exhausted */
}
That's the entire allocator. No free list to maintain, no fragmentation
to worry about — there's nothing to fragment when every slot is the same
fixed size and lives at a compile-time-known address. The price for that
simplicity is explicit and deliberate: destroying entity 5 and creating a
new one immediately afterward hands back the same ID, 5, for a
completely different logical entity. There's no generation counter to
tell the two apart. For the scene sizes and lifetimes this backend
targets — a handful of objects that mostly live for the whole level, not
a churn of thousands spawning and despawning every frame — that's an
acceptable trade, not an oversight; it's directly covered by a unit test
(test_entity_slot_recycled_first_fit) precisely so it stays a known,
intentional property instead of a surprise.
Components: a bitmask and a flat array
Each entity slot carries one uint64_t bitmask, one bit per registered
component type. framer_component_set() is a memcpy into a
fixed-stride row of the flat s_store array, plus a bit set:
void framer_component_set(framer_world_t *world, framer_entity_t e,
                          framer_id_t id, const void *data)
{
    int ei = EIDX(e);
    int ci = cidx(id);
    /* ...bounds and liveness checks elided... */
    memcpy(&s_store[ci][ei * FRAMER_STATIC_MAX_COMPONENT_SIZE], data,
           s_comp[ci].size);
    s_comp_mask[ei] |= ((uint64_t)1u << ci);
    s_any_mask |= ((uint64_t)1u << ci);
}
A query is just a precomputed mask built from the component ids it asks
for; matching an entity against it is one AND and one comparison
((s_comp_mask[ei] & mask) == mask). The uint64_t bitmask is also
the hard ceiling on how many distinct component types can exist in one
world — 64 — which is generous for a retro scene's needs but means the
type system itself enforces "don't try to build something Flecs-shaped
on top of this."
War story: a silent NULL deref vs. a loud abort()
The single most important property of this backend isn't the data
layout — it's what happens when a limit is hit. Early on,
framer_component_register() returned 0 when a component was too big
or the registry was full, the same "just signal failure" convention used
everywhere else in this API. That sounds reasonable until you trace what
a 0 component id actually does downstream: framer_query_create()
silently skips it when building a query's mask, and the system that
registered that query goes on to call FRAMER_FIELD() for a field that
was quietly dropped — which dereferences NULL on the system's very next
matching entity. That's exactly what happened on a real GBA build: a
Text component at 288 bytes against a 64-byte cap, and 17 registered
component types against a cap of 12. The crash that surfaced wasn't "your
component is too big," it was a NULL-pointer SIGSEGV deep inside a render
system, two layers removed from the actual mistake.
The fix removes the silent path entirely:
if (size > FRAMER_STATIC_MAX_COMPONENT_SIZE) {
    fprintf(stderr,
        "framer_component_register: \"%s\" is %lu bytes, "
        "exceeding FRAMER_STATIC_MAX_COMPONENT_SIZE (%d)\n",
        name ? name : "?", (unsigned long)size,
        (int)FRAMER_STATIC_MAX_COMPONENT_SIZE);
    abort();
}
abort() rather than an assert() or a GCC/Clang-specific builtin,
because this backend also has to compile under cc65 and SDCC for
8-bit targets — plain C89 abort() is the one failure primitive
guaranteed to exist everywhere this code runs. The test suite verifies
the contract, not just the arithmetic: test_ecs_static_limits.c
forks a child process, registers one component past the limit inside it,
and asserts the child died of SIGABRT rather than returning normally
— proving the fail-loud path actually fires, not just that the size
check's math is correct.
The broader lesson generalizes past this one bug: on a backend built
entirely out of fixed-size arrays, every hard limit is a wall, not a
suggestion. The only choice that matters is whether you hit that wall
with a clear error message at the exact call site that caused it, or
with a corrupted query and a crash three function calls away. This
backend picked loud, on purpose, everywhere a hard cap exists.
Sizing the pools, and a second silent-failure bug
Each target's meson.build picks FRAMER_STATIC_MAX_COMPONENTS,
FRAMER_STATIC_MAX_ENTITIES, and FRAMER_STATIC_MAX_COMPONENT_SIZE
to fit what that platform actually needs — there's no universal default
that's right for every target, because the engine registers its full set
of core components (Transform, Velocity, Sprite, Light,
Text, Camera, and so on — 19 today) unconditionally, regardless
of whether a given example actually uses all of them:
# Embedded (system == 'none'):
-DFRAMER_STATIC_MAX_COMPONENTS=19
-DFRAMER_STATIC_MAX_ENTITIES=96
-DFRAMER_STATIC_MAX_COMPONENT_SIZE=64
That MAX_ENTITIES=96 number has its own bug story behind it. Each
registered component type — not each entity actually created — reserves
one sentinel slot out of the same entity pool, so the entities actually
available to a scene is MAX_ENTITIES minus however many component
types exist. At MAX_ENTITIES=64 and 19 components, that left 45 usable
slots — comfortably enough for examples/simple_cube, but one short of
examples/input_tester's 48 (47 on-screen panel entities plus one
camera). The failure mode was, again, silent: framer_entity_create()
returning 0 once the pool filled, and the caller that wanted one more
entity for a gamepad-axis label simply never got it — the text just never
appeared on screen, with nothing in the logs to say why. Raising the cap
to 96 (77 free after the 19 sentinels) fixed it with headroom to spare.
On the GBA build that growth costs about 544 bytes of IWRAM (three
per-entity arrays scale with the cap), which was checked against the
build's actual free IWRAM margin before landing — on a 32KB budget,
guessing isn't good enough, you measure.
That measurement habit is the same one from the performance article:
arm-none-eabi-size -A on a current GBA build shows exactly where this
backend's memory actually goes. The flat component store
(19 × 96 × 64 bytes ≈ 114KB) is placed in EWRAM's .sbss section — too
big for IWRAM, and zero-initialized for free by the startup code without
costing any ROM space:
#ifdef GBA
#define _FRAMER_STORE_ATTR __attribute__((section(".sbss")))
#else
#define _FRAMER_STORE_ATTR
#endif

static uint8_t _FRAMER_STORE_ATTR
    s_store[FRAMER_STATIC_MAX_COMPONENTS]
           [FRAMER_STATIC_MAX_ENTITIES * FRAMER_STATIC_MAX_COMPONENT_SIZE];
Everything else — the alive flags, the masks, the per-frame iterator's
entity list — is small enough to live in IWRAM, the GBA's fast 32KB
scratch memory, where the CPU actually wants its hot working data. On
the current examples/simple_cube build that's roughly 19.5KB of
IWRAM used out of 32KB, leaving real headroom for the next component or
two — a number worth checking again every time that count grows, the
same way the 96-entity fix had to be checked against it.
The scan loop, briefly
framer_world_progress() walks every registered system, in phase
order, and for each one scans entity slots up to the high-water mark
(s_entity_high, one past the highest slot any entity or component
sentinel has ever occupied) looking for bitmask matches. That scan, and
the sticky s_any_mask check that skips it entirely for systems whose
component type no entity has ever had, was the single biggest win in
the previous article's performance work — covered there in full, since
it's a perf story more than a design story. The design point that
matters here is simpler: this is a linear scan over a flat array, not a
sparse-set or archetype-table lookup. That's the right trade at GBA
scene sizes (tens of entities), and the wrong one at thousands — which is
exactly the line where you'd reach for Flecs instead.
What this design explicitly gives up
None of the above is free, and being upfront about the trade-offs is the
point of having two backends instead of pretending one ECS fits every
target:
- No entity generations. As covered above, IDs are recycled
immediately and look identical to the entity that previously held
them.
- No archetypes, no sparse sets. Matching is a linear scan with a
bitmask test, not a cache-optimized contiguous iteration over exactly
the matching entities. Fine at dozens of entities; the wrong tool past
that.
- 64 component types, total, forever, for the whole world. Not per
query — for every component type that exists anywhere in the engine,
shared across every system. The engine's current 19 leaves room to
grow, but a "just add a component" change always has a final cost
attached: someone, somewhere, has to recheck that ceiling.
- No relationships, no hierarchies, no observers. Flecs has all of
these; this backend has entities, components, and queries, deliberately
nothing more.
Every one of these is a real capability Flecs has and this backend
doesn't. They're also exactly the features that cost the heap, the
dynamic bookkeeping, and the unpredictable-at-compile-time memory use
that a bare-metal ROM target can't afford. The two-tier split exists so
that trade only has to be made once, explicitly, per target — not
silently, by whichever ECS happened to compile.
Where this goes next
The same problem — "no OS, no heap, fixed memory map, known component
set" — is true of every retro target on framer-engine's roadmap, not just
the GBA. The 32-bit-era consoles mentioned in the previous article's
closing section, starting with the PlayStation 1, sit in an interesting
middle ground: dramatically more RAM and a real GPU compared to the GBA,
but still no OS and still nothing resembling a desktop heap. The
expectation going in is that they'll want this same static backend, just
with much larger pool constants — not Flecs, and not a third ECS
implementation. Whether that expectation survives contact with an actual
PS1 build, the way the "obviously correct" tricks in the performance
article sometimes didn't survive contact with measurement, is exactly
the kind of thing a future article on this blog will have to report
honestly either way.
Introduction
framer-engine is a small cross-platform ECS game engine I've been
building, with backends ranging from desktop OpenGL/Vulkan down to bare
software rendering on 8/16-bit consoles. The Game Boy Advance backend
renders actual textured/shaded 3D meshes — cubes, cones, spheres — through
a CPU-only software rasterizer, on a 16.78MHz ARM7TDMI with no FPU and
no hardware polygon fill. Every float operation is a soft-float library
call, every divide is a library call, and every pixel is a CPU
read-modify-write into VRAM.
Note
framer-engine is a personal side project. The source code will be
made publicly available once the engine reaches a sufficient level of
maturity.
This article is about what it actually takes to make that fast — not in
theory, but measured. Every number below comes from
scripts/debug/gba/cycle_probe.py, a small script that sets a
breakpoint on the engine's vblank-wait function inside headless mGBA
and reads the emulator's cycle counter on every hit. mGBA's CPU emulation
is deterministic: the same ROM run with the same inputs produces
bit-identical cycle counts every time, which means an optimization claim
isn't "it looked smoother" — it's "frame N now costs X fewer cycles, every
single run." I discard the first ~100 frames as warm-up (caches, branch
predictor-equivalent effects, lazy first-frame setup) and average the
steady-state window after that.
That discipline matters more than any individual trick below, because
twice during this work an optimization that was obviously, mathematically
correct measured as a regression. More on that at the end.
The hardware constraint that drives everything
The GBA's display is locked to the LCD's scanout rate. A frame takes
exactly 280896 cycles of the system clock to display, whether or not
your CPU work fits inside it — if you go over, you just drop to displaying
every other frame (or worse), the displayed frame rate quantizing to
59.73 / n for whatever integer multiple of that budget your frame
actually costs. There's no "GPU" to defer to and no way to partially
miss the deadline gracefully. The entire optimization exercise is: get
the CPU-side frame cost under (or as close as possible to) 280896 cycles.
Every technique below exists because of two specific limits:
- No FPU. Any float/double arithmetic — multiply, divide,
sqrtf(), sinf()/cosf()/tanf() — compiles to a call into
ARM's soft-float runtime. That's not "slower than native float," it's
"a function call plus a software algorithm" for every single operation.
- No hardware rasterizer. Mode 4's bitmap layers are just VRAM you
write to with the CPU. Every triangle the software renderer fills is
pixels the ARM7TDMI itself has to compute and store, one at a time.
Technique 1: fixed-point math instead of float
The most foundational change is also the simplest to state: the hot path
(per-vertex transform, per-pixel rasterization) uses Q12 fixed-point
integers instead of float, via a small fix_t type
(src/backends/renderer/common/sw3d_fixed.h):
typedef int32_t fix_t;

#define FIX_SHIFT 12
#define FIX_ONE   (1 << FIX_SHIFT)   /* 4096 == 1.0 */

static inline fix_t fix_mul(fix_t a, fix_t b)
{
    return (fix_t)(((int64_t)a * (int64_t)b) >> FIX_SHIFT);
}
fix_mul's int64_t intermediate looks like it should be expensive,
but on ARM it lowers to a single hardware SMULL (signed multiply,
64-bit result) instruction — no library call, no precision tricks, just
the right type for the CPU's native multiply. Compare that to a
float * float, which on this target is a soft-float call doing
mantissa/exponent bookkeeping in software.
Division is the one place fixed-point still hurts, because there's no
hardware divider on the ARM7TDMI either way — fixed-point divide still
costs a library call (__aeabi_idivmod et al.), just an integer one
instead of a float one. The perspective-divide hot path exploits a
narrower fact about that specific division to cut its cost further:
/* fix_div()'s general implementation widens to a 64-bit intermediate to
 * stay correct for arbitrary numerators, but the perspective divide's
 * numerator is always FIX_ONE, so FIX_ONE << FIX_SHIFT never exceeds
 * 32 bits. */
static inline fix_t fix_reciprocal(fix_t b)
{
    return (fix_t)(((int32_t)FIX_ONE << FIX_SHIFT) / b);
}
That one change — replacing the general 64-bit fix_div() with a
32-bit-only reciprocal for the one call site where the numerator is known
to always be FIX_ONE — measured a ~50,000 cycle/frame saving on
examples/spinning_shapes, just from giving the divide routine a
narrower, cheaper problem to solve.
Technique 2: a LUT instead of sinf()/cosf()
framer_transform_get_matrix() (the shared, cross-platform transform
code) builds rotation matrices via cglm's glm_rotate_{x,y,z}(), which
call cosf()/sinf(). On desktop that's a couple of FPU
instructions; on the GBA it's a soft-float libm round trip, once per
axis, per object, per frame.
The GBA backend instead carries its own 256-entry sine table
(sw3d_raster.c), reading cosine from the same table at a quarter-turn
offset, with linear interpolation between samples:
static const fix_t gba_sin_lut[256] = { /* ... */ };

static void gba_fast_sincosf(fix_t angle_turns_256, fix_t *s, fix_t *c)
{
    int idx = angle_turns_256 & 0xff;
    int cidx = (idx + 64) & 0xff; /* cos(x) == sin(x + tau/4) */

    *s = gba_sin_lut[idx];
    *c = gba_sin_lut[cidx];
}
256 entries means ~1.4° between samples — far finer than visible on a
240x160 screen, so the linear interpolation error never shows up as
visible jitter. Swapping this in for the float sin/cos chain, measured
A/B (git stash + identical build/measure commands) on
spinning_shapes (which rotates 3 objects on all 3 axes every frame):
1,294,320 → 1,234,341 cycles/frame, a ~4.6% reduction, from removing
one class of soft-float call entirely.
A follow-up went further: rather than building the rotation matrix the
way cglm does — up to three separate generic 4x4 matrix multiplies, one
per nonzero Euler axis, each a 64-multiply-add matmul even though most
entries of a pure-axis rotation matrix are 0 or 1 — the combined
Rz·Ry·Rx product's 9 nonzero 3x3 entries are expanded by hand from the
three angles' sin/cos (still sourced from the LUT above) and folded into
the output with a single glm_mat4_mul instead of up to three:
/* out = Rz * Ry * Rx, 9 nonzero entries expanded by hand instead of
 * three generic 4x4 matmuls. */
out[0][0] = cy * cz;
out[0][1] = cy * sz;
out[0][2] = -sy;
out[1][0] = sx * sy * cz - cx * sz;
out[1][1] = sx * sy * sz + cx * cz;
out[1][2] = sx * cy;
out[2][0] = cx * sy * cz + sx * sz;
out[2][1] = cx * sy * sz - sx * cz;
out[2][2] = cx * cy;
This was verified against the original three-matmul path via NumPy
differential testing across all 8 zero/nonzero axis combinations plus
thousands of random angle triples (max absolute error ~1e-16) before it
ever touched the renderer. Measured gain: only 1,309,080 → 1,306,224
cycles/frame, ~0.22% — much smaller than the raw operation count
suggests, because the compiler's optimizer already folds away most of the
original chain's zero/one multiplies once each Rz/Ry/Rx factor
starts from an identity-seeded matrix. The lesson here isn't "this
technique didn't matter" — it's that hand-expanding math only pays for
itself once you've checked what the compiler was already doing for you.
A second, branch-free variant that skipped the matrix multiply
altogether (translation column copy + per-column scale) was also tried
and measured worse in every iteration than this simpler one-matmul
version — discarded in favor of what actually measures faster.
Technique 3: Quake III's fast inverse square root
Triangle shading needs each surviving triangle's world-space normal,
normalized — once per shaded triangle, per frame, in the single hottest
loop of the renderer. cglm's glm_vec3_normalize() calls sqrtf()
and then divides by it: two soft-float library calls per triangle.
The fix is the famous bit-hack:
static float sw3d_fast_inv_sqrt(float number)
{
    union { float f; uint32_t i; } conv = { .f = number };

    conv.i = 0x5f3759df - (conv.i >> 1);
    conv.f *= 1.5f - (0.5f * number * conv.f * conv.f); /* one Newton-Raphson step */
    return conv.f;
}
One magic-constant bit-shift gets a rough inverse-square-root estimate
straight from the float's IEEE bit pattern (no sqrt call at all), and one
Newton-Raphson correction step sharpens it to be visually indistinguishable
from the real thing for lighting purposes. Replacing both the sqrt and
the divide with this one function, used at every site in the GBA backend
that previously called glm_vec3_normalize() (face-normal lighting in
the renderer, and the rasterizer's own triangle-normal centroid
computation), removes two soft-float calls per triangle for one cheap
integer/float hybrid op.
Technique 4: an ECS dispatch early-out
Not every win is renderer-specific. framer_world_progress(), the ECS
scheduler's per-frame loop, walked every registered system's full entity
range every frame — including systems whose query needs a component type
that no entity in the scene has ever had. simple_cube registers
collider/velocity/rigidbody systems unconditionally on every platform
(component import is unconditional, regardless of whether the scene
actually uses them), so most of those systems were scanning entities every
frame only to match zero of them, every single time.
The fix tracks a sticky OR of every component bit ever set across the
world's lifetime, and skips a system's scan entirely — O(1), no entity
walk at all — whenever its query's required mask includes a bit outside
that set, which can provably never match:
/* s_any_mask: sticky OR of every component bit ever set across the
 * world's lifetime. A query whose mask requires a bit outside this set
 * can never match any entity — skip the per-entity scan entirely. */
if ((q->mask & world->s_any_mask) != q->mask)
    continue;
This is the single largest win found across the whole project:
simple_cube: 308650 → 288629 cycles/frame; spinning_shapes:
757806 → 744701 cycles/frame (both steady-state averages over frames
101-150). A scheduler-level fix, not a renderer trick, but it followed
from the exact same discipline: measure where the cycles actually go,
don't assume.
Technique 5: making divides Bresenham-shaped
The scanline rasterizer (sw3d_fill_triangle()/sw3d_fill_quad())
originally tested every pixel inside each triangle's bounding box against
all three edge functions to decide if it was inside. The replacement
computes each row's [lo, hi] x-span directly per edge, incrementally,
which is exactly Bresenham's line algorithm applied to "x as a function of
y" along a triangle edge:
/* Incrementally tracks bound(y) = floor((b0 + (y - y0) * d) / a) for a
 * fixed positive `a`, one row at a time, with zero divisions after
 * init. The GBA's ARM7TDMI has no hardware divider, so trading one
 * division per edge (at init) for what used to be a same-sign test on
 * every bounding-box pixel is the whole point. */
struct row_bound {
    long val, step, rem, err, a;
};
This turns "one division-equivalent test per candidate pixel" into "one
division per triangle edge, plus an integer add per row" — a meaningful
shape change on hardware with no hardware divider at all.
It also produced one of the more unusual micro-optimizations in the
codebase. The one division this scheme still needs per edge
(floordiv_pos()) is built on a / b and a % b in C, which GCC
is supposed to fuse into a single __aeabi_idivmod call when both are
needed. Disassembly showed that fusion happening on one branch
(a > 0) but not the other (a < 0, which negates both operands
first) — an extra, redundant __aeabi_idiv call alongside the
__aeabi_idivmod for the same division, confirmed to be a GCC
codegen quirk specific to that branch (restructuring the C source
produced byte-identical codegen either way, so it wasn't fixable from the
C side). The actual fix is to call the library function directly and
unpack its packed 64-bit r0:r1 quotient/remainder result by hand,
removing the compiler's latitude to make the wrong call-fusion choice at
all:
extern long long __aeabi_idivmod(long numerator, long denominator);

static long floordiv_pos(long a, long b)
{
    long long qr = __aeabi_idivmod(a, b);
    long q = (long)(uint32_t)qr;
    long r = (long)(qr >> 32);

    if (r != 0 && a < 0)
        q--; /* C truncates toward zero; floor() needs a -1 correction */
    return q;
}
Saved roughly 25,000-30,000 cycles/frame on spinning_shapes — for
removing one redundant library call the compiler was inserting on its
own, on one branch only, for no reason a compiler flag could fix.
Technique 6: let the hardware scale a smaller image
The GBA has no hardware polygon fill, full stop — every pixel the
rasterizer covers is a CPU read-modify-write into VRAM, which is the hard
floor under every other optimization in this list: at some point you've
removed every avoidable division and float op, and you're still bound by
"how many pixels does the CPU have to touch."
The way around that floor isn't a CPU optimization at all: Mode 4's BG2
background layer supports affine transforms even though it's a flat
bitmap — the same trick behind GBA titles that faked SNES Mode-7-style
scaling. The renderer draws only a 120x80 corner of the framebuffer (a
quarter the pixels of the real 240x160 screen) and lets BG2's affine
matrix stretch that corner across the full screen at scanout time, for
free, in hardware:
#if GBA_RENDER_SCALE == 1
static inline void gba_clear_buffer(vu16 *base) { /* full-res clear */ }
#else
static inline void gba_clear_buffer(vu16 *base)
{
    /* only clear the GBA_RENDER_WIDTH x GBA_RENDER_HEIGHT corner that's
     * actually sampled by BG2's affine matrix — the rest of the page is
     * never displayed, so clearing it is wasted work. */
}
#endif
On spinning_shapes this dropped steady-state cost from ~1.55M to
~1.28M cycles/frame — roughly 10.8fps → 13.1fps, a ~17% reduction —
at the cost of visibly blockier 2x-nearest-neighbor-scaled edges. It's
opt-in (-Dgba_half_res) rather than default, because unlike every
other technique here it's a genuine, visible quality trade-off rather
than a free win — worth calling out, since this whole article is
otherwise about zero-visual-cost changes.
The measurement discipline that makes any of this credible
None of the numbers above are estimates. scripts/debug/gba/cycle_probe.py
drives headless mGBA, sets a breakpoint on the engine's vblank-wait call
(the one point every frame reliably passes through exactly once), and
reads the emulator's own cycle counter on every hit. Because mGBA's CPU
core is a deterministic interpreter/JIT — not a real, jittery piece of
silicon — the same ROM, same breakpoint, same number of warm-up frames
discarded, produces bit-identical cycle counts on every run. That
turns "did this help?" from a vibes question into a yes/no one: rebuild,
re-run the probe, diff the number.
That discipline is also what caught the two times this project tried an
"obviously correct" optimization that wasn't.
War story 1: caching screen-space half-extents that never change
The camera's screen-space half-width/half-height, once converted to
fixed-point, don't change frame to frame unless the camera's projection
changes — so hoisting that fixed-point conversion out of the per-vertex
projection loop and caching it looked like a pure, free win: same
values, computed once instead of once per vertex.
It measured as a regression.
The likely cause, confirmed by inspecting the generated assembly rather
than guessing: this project builds with link-time optimization
(LTO) and -Doptimization=3 across the board, and LTO's inlining
heuristics are sensitive to function and loop size in ways that aren't
intuitive from the C source. Adding a cache check (even a cheap one) to
an already-hot, already-inlined loop changed the cost/benefit math the
inliner used elsewhere in the same translation unit, and the net effect
of removing unrelated, more valuable inlining outweighed the
arithmetic actually saved. The "obviously correct" loop-invariant hoist
was correct about the math and wrong about the measured outcome.
War story 2: skipping integration work for a zero velocity
The same pattern showed up again, independently, in
velocity_integration_system(). Most entities in simple_cube have
a Velocity component that's exactly zero every frame — adding a
zero-vector early-out before the glm_vec3_scale/glm_vec3_add calls
is mathematically a no-op (scaling and adding a zero vector changes
nothing), so it looked like free cycles for every entity that wasn't
actually moving:
/* tempting, and wrong on this build */
if (glm_vec3_isvalid(v->linear) && glm_vec3_norm2(v->linear) == 0.0f &&
    glm_vec3_norm2(v->angular) == 0.0f)
        continue;
Measured: +112 cycles/frame on simple_cube, +312 on spinning_shapes.
A regression, on a change with no behavior difference whatsoever. Same
root cause as the screen-extent cache: the early-out added code size and
a branch to a hot loop, LTO's inlining decisions shifted in response, and
whatever inlining was lost elsewhere cost more than the skip saved. It
was reverted in the same session it was tried, per the same rule that
caught it: measure before keeping, no exceptions for changes that "can't
possibly" make things worse.
The takeaway isn't "don't trust loop-invariant hoisting" or "don't trust
early-outs" — both are completely standard, usually-correct techniques.
It's that once a build is leaning on LTO and aggressive optimization
levels to do a lot of the heavy lifting, the compiler's own decisions
become part of the system you're optimizing, and they don't always move
in the direction your mental model of the code predicts. The only way to
know is the same cycle_probe.py round-trip used for every win in this
article: change one thing, measure, keep it only if the number actually
goes down.
War story 3: quantizing colors in the wrong number system
The GBA backend's shaded sprites and triangles go through
gba_palette_index(): a linear scan (up to 256 entries, with a nearest-
color distance calculation once full) that maps a computed RGB555 value
onto BG_PALETTE, since Mode 4 is 8bpp paletted, not true color. A
one-entry cache short-circuits two consecutive calls requesting the
exact same value — but continuous per-frame lighting math (examples/
lighting, added since this article's original techniques, orbits two
colored point lights around a static sphere and cube) makes each shaded
triangle request a slightly different value almost every frame, defeating
that cache and driving the palette to saturation within seconds.
The fix looked obvious: round each lit color channel to a coarser step —
16 buckets instead of RGB555's own 32 — before it ever reaches the
palette lookup. A gradually-changing light then collapses onto a much
smaller, more repeated set of values: more cache hits, and a palette that
stays truer to intent for longer before saturating. The first
implementation did this in float space, right where the lit color was
already a float:
/* looked free, measured otherwise */
static inline float gba_quantize_channel(float v)
{
    const float steps = 16.0f;
    return (float)(int)(v * steps + 0.5f) * (1.0f / steps);
}
Measured with cycle_probe.py on the same orbiting-lights demo, 150
frames, steady-state average over frames 101-150: 646528 cycles/frame
with no quantization at all, versus 658869 with it — a ~1.9%
regression, not the improvement it was meant to be.
The cause, once measured rather than assumed: this is still the same
FPU-less ARM7TDMI every other technique in this article exists to work
around. v * steps + 0.5f, the cast, and * (1.0f / steps) are three
more soft-float library calls, paid on every one of the three channels,
for every shaded triangle, every frame — and that cost was larger than
whatever palette-scan time it was saving. An optimization aimed
specifically at this hardware's constraint had itself ignored that same
constraint.
The fix moves the rounding into integer space instead, using a value the
code already computes. f_to_5bit() (the existing float→RGB555-channel
helper) produces a clamped 0-31 integer; masking off its low bit gives 16
buckets — the identical bucket count as the float version — for the cost
of one AND on a value that has to be computed either way:
static inline u16 f_to_5bit_quantized(float v)
{
    return (u16)(f_to_5bit(v) & ~1u);
}
Same demo, same steady-state measurement: 642455 cycles/frame — a
genuine, if modest, ~0.63% improvement over the no-quantization
baseline. The idea behind the optimization was sound; it just had to be
expressed in a number system this CPU can actually multiply in for free.
Where this leaves things
After all of the above, examples/simple_cube sits at 288074
cycles/frame — 16777216 / 288074, the same ratio cycle_probe.py
itself reports for every measurement in this article — works out to
~58.24fps, against a true-60fps budget of 280896 cycles (~59.73fps).
That's about 2.5% over budget, down from a starting point of roughly
7-8% over before this round of work. spinning_shapes — three fully
shaded objects rotating on all three axes every frame, a heavier scene
by design — sits at 741378 cycles/frame, ~22.63fps. Both are ceilings
for these specific demo scenes on real, cycle-accurate emulation, not
estimates: add more triangles or lights to either scene and the
frame cost (and fps) moves accordingly. Closing the rest of that gap on
simple_cube would mean moving into riskier
territory: caching ECS query results across frames (not just the
existence-of-any-entity check from Technique 4), or pre-converting mesh
vertex data to fixed-point ahead of time instead of per-vertex at raster
time — the latter complicated by the fact that the same mesh struct is
also populated through framer-engine's public, float-only custom-mesh
API, so caching it would mean either changing that API or building a
runtime cache-on-first-use scheme. Both are real options, just bigger
ones than "swap a divide for a multiply" — a good place to stop for now
and pick back up deliberately, rather than rush into more soft-float
removal for diminishing, harder-to-verify returns.
What's next
The GBA backend was the first proof that framer-engine's "real ECS, real
3D, software-rendered, no FPU" approach actually holds up on constrained
hardware. The next targets are mainly a step up in capability rather than
a step down: 32-bit-era consoles like the PlayStation 1, and handhelds
with genuine 3D hardware acceleration — PSP, Nintendo DS, and 3DS. That
side of the plan is mostly for fun: getting framer-engine to a point
where it's genuinely pleasant to build small demos and little indie games
on real retro hardware, GBA included.
But at least one of those targets — most likely the PSP, the one with the
most conventional FPU-plus-GPU setup of the group — is also there for a
different reason. Every technique in this article exists because the
GBA has no FPU and no hardware rasterizer; on a platform that has both,
none of those specific tricks apply, and the interesting question flips
from "how do I avoid the hardware's weaknesses" to "how far can the
engine and the hardware actually go together, pushed deliberately to
their limits, with the GPU and FPU doing what they're meant to do."
That's a different kind of optimization work — closer to traditional
real-time-3D budgeting (draw calls, vertex throughput, fill rate) than
to soft-float avoidance — and it needs the same measurement discipline as
everything above, just pointed at a different bottleneck. Whether the
specific tricks in this article carry over at all won't be clear until
that work actually starts; future articles will cover whatever turns out
to be that generation's equivalent surprise.
I did not want my code to leave my network. Every agentic coding session
sends a stream of file contents, project structure, and half-finished thoughts
to whatever model answers the prompts. Routing all of that through a third-party
API felt like the wrong default, even when the provider is trustworthy: it is
recurring cost for routine work, it stops working the moment the LAN or VPN
does not reach the internet, and it teaches me nothing about how the serving
side of an LLM stack actually behaves under constrained hardware. So I built
llm-companion, a rootless Ollama stack for Fedora Server and Debian that I
can run on a spare machine at home and point OpenCode at, with cloud
providers wired in only as an explicit fallback rather than the default path.
This article walks through what the stack looks like, why it is built the way
it is, and how to deploy it yourself.
What llm-companion Is
At its core, llm-companion is a single Kubernetes Pod manifest
(kube/stack.yml) deployed by Ansible, running five containers that share
one network namespace:
Internet / LAN / VPN
        │
     :8080  ← firewalld / ufw opens only this port
        │
┌────────────────────────────────────────────────────────┐
│  llm-companion Pod  (shared network namespace)         │
│                                                        │
│  ┌──────────────────────────────────────────────────┐  │
│  │  caddy  :8080 (hostPort)                         │  │
│  │  Bearer token auth on /ollama/api/* /ollama/v1/* │  │
│  │  Passes /searxng/* to SearXNG (Bearer token)     │  │
│  │  Passes / to Open WebUI                          │  │
│  └───────────────────┬──────────────────────────────┘  │
│                      │ localhost                       │
│  ┌───────────────────▼──┐  ┌───────────────────────┐   │
│  │  ollama :11434       │  │  open-webui :3000     │   │
│  │  (internal)          │  └────────┬──────────┬───┘   │
│  └──────────────────────┘           │          │       │
│                              ┌──────▼──┐  ┌────▼──────┐│
│                              │ searxng │  │   open-   ││
│                              │  :8888  │  │ terminal  ││
│                              │         │  │  :8000    ││
│                              └─────────┘  └───────────┘│
└────────────────────────────────────────────────────────┘
Ollama serves the models, Open WebUI provides a chat interface with
document/RAG support, SearXNG gives the chat agent web search without
sending queries to a third party, and Open Terminal gives the agent a sandboxed
shell. Caddy is the only container exposed to the host network, and it
enforces a Bearer token on every API route.
Open WebUI is the browser-facing piece: besides the chat interface, it
keeps its own user accounts and conversation history, and lets you upload
documents for retrieval-augmented generation without standing up a separate
vector store just for that.
SearXNG is a self-hosted metasearch engine — it aggregates results from
other search engines and returns them without forwarding the query to any
single one of them, which is what lets the agent's web-search tool stay
consistent with the rest of the stack's no-third-party-by-default stance.
Caddy is the reverse proxy and, as noted above, the only place auth is
enforced — it is also the only container that would need to know about TLS,
so adding HTTPS later (if this ever leaves the LAN) is a Caddyfile change,
not a new container.
Open Terminal gives a sandboxed shell on the pod, reachable from the
browser — useful for checking logs or restarting a service without opening
a separate SSH session.
The whole thing targets two use cases: chatting through Open WebUI from a
browser, and routing OpenCode's agentic coding sessions through Ollama's
OpenAI-compatible API — the same workflow you would normally point at Claude
or GPT-4o, but served from hardware you control.
Why It Is Built This Way
A few decisions in the stack are not obvious from the README's quick-start, but
they are the part I actually learned something from.
One Pod, one exposed port. All five containers share a single network
namespace and talk to each other over localhost, not DNS names. Only Caddy
publishes a hostPort. This means the firewall rule is one line
(8080/tcp), and there is exactly one place — the Caddyfile — where
authentication is enforced. Open WebUI and Open Terminal are never reachable
directly, even from the LAN.
Bearer auth at the proxy, not in each service. Ollama and SearXNG have no
authentication of their own. Caddy terminates every request and checks a
Bearer token before forwarding to /ollama/api/*, /ollama/v1/*, or
/searxng/*. Open WebUI keeps its own login, since it already has user
accounts. Centralizing auth in the proxy means rotating the key
(generate-api-key.sh) only touches one Kubernetes Secret, not three
services' configs.
A hardware-aware model picker instead of a fixed model list. Self-hosted
LLM advice tends to assume either a beefy GPU or hand-picking quantizations
yourself. pull-models.sh detects architecture (x86_64/aarch64), accelerator
(CPU, AMD ROCm, NVIDIA CUDA), and available RAM/VRAM, then selects the best
model per category (coding, vision, general, embedding) that actually fits —
down to a 1.5B coding model and 1.7B reasoning model on a 2 GB ARM64 board, up
to Devstral Small 2 24B on a 16 GB+ GPU. --list shows the plan before
pulling anything.
Quadlet over a bare ``podman run``. The pod is managed by a Quadlet
.kube unit, which gives it normal systemd semantics — systemctl --user
restart llm-companion, automatic restart on failure, and
AutoUpdate=registry so a podman auto-update timer can pull newer
pinned images without manual intervention. Rootless throughout, with
loginctl linger so the user service survives without an active login
session — important for a box that is meant to just sit there and serve
requests.
Deploying It
The fastest way to see the stack end-to-end is vm.sh, which provisions a
QEMU/KVM VM running the exact same Ansible playbook and kube/stack.yml used
on real hardware:
sudo dnf install qemu-kvm qemu-img wget curl genisoimage
sudo usermod -aG kvm $USER && newgrp kvm

git clone https://github.com/tprrt/llm-companion
cd llm-companion

./scripts/vm.sh build           # one-time provisioning (~golden image)
./scripts/vm.sh start           # boots in ~2 minutes from there on
This is how I iterate on the stack itself — rebuild the golden image after a
change, boot, check the services, tear down — without touching real hardware.
For an actual deployment, copy the example inventory and point it at your
server:
cp ansible/inventory/hosts.yml.example ansible/inventory/hosts.yml
$EDITOR ansible/inventory/hosts.yml
all:
  children:
    llm_companion:
      hosts:
        my-server:
          ansible_host: 192.168.1.100
          ansible_user: fedora
          ansible_ssh_private_key_file: ~/.ssh/id_ed25519
Then run the playbook:
ansible-playbook -i ansible/inventory/hosts.yml ansible/site.yml
It handles, in order: required directories and linger (common), opening
port 8080 via firewalld or ufw (firewall), installing Podman and building
the Ollama image (podman), and generating the API key, installing
stack.yml, and starting the systemd service (llm-stack). It is
idempotent — re-run it any time you change the inventory or pull new code.
Pull models sized to your hardware:
./scripts/pull-models.sh --list    # dry run — see what would be pulled
./scripts/pull-models.sh           # pull the best model per category
On an AMD GPU host, re-run Ansible with -e "ollama_build_target=rocm" first
to build the ROCm image and deploy stack-rocm.yml instead, which grants the
container access to /dev/kfd and /dev/dri.
Wiring Up OpenCode
On the client machine, point OpenCode at the server through its
OpenAI-compatible provider config (~/.config/opencode/opencode.json):
{
  "$schema": "https://opencode.ai/config.json",
  "model": "ollama/qwen3-8b-16k",
  "provider": {
    "ollama": {
      "npm": "@ai-sdk/openai-compatible",
      "name": "Ollama",
      "options": {
        "baseURL": "http://<server-ip>:8080/ollama/v1",
        "headers": { "Authorization": "Bearer sk-ollama-<your-key>" }
      },
      "models": {
        "qwen3-8b-16k": { "name": "Qwen3 8B — coding/vision/general (16k)", "tools": true }
      }
    }
  }
}
The key is printed at the end of the Ansible run and stored in
~/.config/ollama/api-key.env on the server. Switch models at any time with
/models inside OpenCode — no restart needed.
Cloud providers (Anthropic, GitHub Copilot) can sit alongside the ollama
provider in the same config, switched to with the same /models command.
That is the fallback path I mentioned earlier: the local stack is the default,
and the cloud is one keystroke away when the network or the hardware cannot
keep up — travelling, a model too large for the box, or the service simply
being down.
Lessons Learned
Rootless GPU access was the part that fought back the most. ROCm needs
/dev/kfd and /dev/dri inside the container, which in turn needs
securityContext.privileged: true — there is no narrower rootless path to
those device nodes today, so the ROCm variant trades some of the isolation
the CPU variant gets for free. That trade-off is explicit in the stack
(stack-rocm.yml is a separate manifest, not a flag on the default one),
and it is documented as a host that should be dedicated rather than shared.
The hardware-aware model picker turned out to matter more than I expected.
Hand-picking a quantization for "your" machine works fine for one machine; it
falls apart the moment the same playbook needs to run unchanged on a 2 GB
ARM64 board, an 8 GB CPU-only Fedora box, and a 16 GB GPU desktop. Encoding the
RAM/VRAM gates once, in one script, meant the rest of the stack — Ansible role,
Quadlet unit, Caddy config — never needed to know which tier it was running
on.
The other recurring theme: most of the actual engineering here is not in
Ollama at all, it is in the boring infrastructure around it — one auth
boundary, one exposed port, one systemd unit, one script that adapts to
whatever box it lands on. That boring part is also what makes me comfortable
leaving it running unattended.
Capitole du Libre is one of France's largest community-driven Free Software and
Open Source events. It is held every year in Toulouse, and I have had the pleasure
of speaking there in 2018, 2019, and 2022. The 2026 edition takes place
on November 14–15 at INP-N7, and the Call for Proposals is now open.
Submission deadline: July 20, 2026 at 23:59 (Europe/Paris).
Topics
All submissions must relate to Free Software or Open Source. The committee welcomes
proposals on:
- Tools and technologies, especially hands-on return-of-experience talks
- Privacy, digital sovereignty, and the societal implications of emerging tech
- Self-hosting and DIY practices
- Community building in Free Software projects
Purely commercial pitches and topics unrelated to Free Software are not accepted.
Travel reimbursement
Conference and workshop speakers can claim up to €150 in travel and accommodation
expenses (receipts required, advance payment available on request). Booth operators
are not eligible for reimbursement.
The committee actively encourages first-time speakers and welcomes beginner-friendly
proposals.
Submit your proposal: cfp.capitoledulibre.org/cdl-2026/cfp.
RIOT-OS 2026.04, codenamed Fire Rizzlease, was released on May 6, 2026.
RIOT is a multi-threading operating system targeting microcontrollers found in the
Internet of Things — from 8-bit and 16-bit MCUs to lightweight 32-bit processors —
with a focus on energy-efficiency, soft real-time capabilities, and a small memory
footprint.
This release spans 84 days of development, 125 merged pull requests composed of 229
commits, and contributions from 27 people. A notable stat: 1,141,523 lines were
deleted against only 25,007 inserted, largely thanks to a major vendor code cleanup.
Codeberg mirror
RIOT is now synced to Codeberg (#21997). This gives the project a home on a
non-profit, community-driven forge alongside its GitHub presence, a welcome step
for an independent open-source project.
Massive EFM32 vendor code removal
Over one million lines of vendor code have been removed from the EFM32 family,
replaced by a pkg/gecko_sdk dependency (#22040). This is the single biggest
contributor to the impressive deletion count and results in a much leaner and more
maintainable codebase for Silicon Labs EFM32-based boards.
Raspberry Pi Pico 2 / RP2350 improvements
The RP2350 support received a thorough overhaul (#21753):
- Unified abstractions between the RISC-V and ARM cores of the RP2350.
- Added the XH3IRQ interrupt controller.
- Updated UART driver.
- Added RISC-V support.
The scope of this work was large enough to inspire a bachelor's thesis at
HAW Hamburg.
New board and CPU support
Three new targets join the supported hardware list:
- pro-micro-nrf52840 (#22089) — a popular nRF52840-based Pro Micro form-factor board.
- slstk3301a (#22069) — Silicon Labs EFM32 Tiny Gecko starter kit.
- STM32H7 (#21978) — high-performance STM32 family, with additional peripheral
support for the nucleo-h753zi (#22076).
New device drivers
- AMG88xx (#22104) — infrared array sensor (thermal camera) from Panasonic.
- ADS1X1X (#21694) — family of Texas Instruments I²C ADCs.
Guide site and documentation
The RIOT Guide Site continues to grow as the default entry point for new users,
progressively replacing Doxygen for prose documentation. This release adds:
- More tutorials.
- An experimental Supported Boards section.
- Unit tests in tutorials (#22042).
- Updated Astro v6 framework (#22145).
The Doxygen API reference remains available at api.riot-os.org.
Networking improvements
Several additions to the GNRC networking stack:
- New gnrc_pktshark module to pretty-print network traffic (#21284).
- gnrc_ipv6_nib_dyn_lladdr_get() API (#22013).
- ABR (Authoritative Border Router) now run-time configurable (#21081).
- Generic UDP shell command (#22049).
Notable bug fixes
43 bugs were fixed in this release, including:
- ESP8266 crashes on reboot and startup (#22014, #22010).
- Potential buffer overflow in the atwinc15x0 driver (#22041).
- NanoCoAP message corruption in coap_build_reply() (#22094).
- Wrong byte order for gyro and accelerometer reads in the MPU-9x50 driver (#22135).
- LVGL configuration and SDL issues on native (#22005, #22139).
The Yocto Project 6.0, codenamed wrynose, was released on May 13, 2026. This
is the new Long-Term Support (LTS) release, succeeding 5.0 "scarthgap". I am
happy to have my name in the contributors list for this release, and I wanted to
take the opportunity to write a short overview of what is new.
If you are migrating from 5.0, make sure to read the migration guides for the
intermediate releases: 5.1 (styhead), 5.2 (walnascar), and 5.3 (whinlatter).
Major component upgrades
The toolchain and core components received significant version bumps:
- Linux kernel 6.18
- GCC 15.2
- glibc 2.43
- LLVM/Clang 22.1.3
- Python 3.14.4
- systemd 259.5
- Go 1.26.2, Rust 1.94.1
- QEMU 10.2.0
- U-Boot 2026.01
Over 300 recipe upgrades in total.
Rust in the Linux kernel
One of the most significant additions is first-class Rust support for building the
Linux kernel and out-of-tree kernel modules:
- A new kernel-yocto-rust class adds the required dependencies to build Rust
components of the kernel.
- A new module-rust class supports building out-of-tree Rust kernel modules. A
skeleton example is available under meta-skeleton/recipes-kernel/rust-out-of-tree-module.
- Enabling Rust in the kernel is now as simple as adding rust to
KERNEL_FEATURES in a recipe that inherits kernel-yocto.
Security improvements on by default
Several security and hardening features that were previously opt-in are now
enabled by default in the nodistro setup:
- security_flags.inc — adds security-related compiler and linker flags.
- no-static-libs.inc — disables most static libraries.
- uninative — allows reuse of native sstate built on one distro on another,
also enabled by default now.
- OpenSSL now disables TLS 1.0/1.1 by default.
WIC is now an external project
The WIC image creator tool has been extracted from OpenEmbedded-Core and is now
maintained as a standalone project. The recipe in OE-Core now builds from
this external source. A new wicenv image type was also added.
What's next
As an LTS release, wrynose will receive long-term maintenance. If you are on
scarthgap (5.0), now is a good time to plan your migration. The migration guide
is available at the Yocto Project documentation.
Understanding the hardware capabilities of classic gaming consoles
provides valuable insight for both homebrew developers and retro gaming
enthusiasts. Each console generation brought significant improvements in
processing power, graphics capabilities, and audio quality, while
working within tight memory constraints and power budgets.
This guide provides detailed technical comparisons across multiple
console generations, from the 8-bit Game Boy to modern hybrid systems
like the Nintendo Switch. Whether you're developing homebrew games or
simply curious about the technical evolution of gaming hardware, these
tables offer a reference.
The processors and memory configurations of gaming consoles reveal much
about their capabilities and limitations. Early consoles operated with
kilobytes of RAM, while modern systems have gigabytes at their disposal.
| Console |
CPU |
Clock
Speed |
|---|
| Game Boy |
Custom Sharp LR35902 |
4.19 MHz |
| Game Boy Color |
Custom Sharp Z80 |
8 MHz |
| NES |
Ricoh 2A03 (MOS 6502) |
1.79 MHz
(NTSC) /
1.66 MHz
(PAL) |
| SNES |
Ricoh 5A22 (65C816-based) |
3.58 MHz
(max) |
| PC Engine |
HuC6280 (MOS 6502-based) |
7.16 MHz |
| Neo Geo |
Motorola 68000 + Zilog Z80 |
12 MHz +
4 MHz |
| Game Boy Adv. |
ARM7TDMI |
16.78 MHz |
| Nintendo DS |
ARM946E-S + ARM7 |
67 MHz +
33 MHz |
| Nintendo 3DS |
Dual-Core ARM11 MPCore |
268 MHz |
| Wii |
IBM PowerPC "Broadway" |
729 MHz |
| PSP |
MIPS R4000-based CPU |
333 MHz |
| Switch |
NVIDIA Tegra X1
(ARM Cortex-A57) |
1.02 GHz |
| Console |
RAM |
|---|
| Game Boy |
8 KB |
| Game Boy Color |
32 KB + 16 KB VRAM |
| NES |
2 KB + 2 KB VRAM |
| SNES |
128 KB + 64 KB VRAM |
| PC Engine |
8 KB + 64 KB VRAM |
| Neo Geo |
64 KB + 68 KB VRAM |
| Game Boy Adv. |
256 KB + 96 KB VRAM |
| Nintendo DS |
4 MB + 656 KB VRAM |
| Nintendo 3DS |
128 MB + 6 MB VRAM |
| Wii |
88 MB (24 MB + 64 MB GDDR3) |
| PSP |
32 MB (PSP-1000) / 64 MB (PSP-2000+) |
| Switch |
4 GB LPDDR4 |
Key Observations:
The evolution from kilobytes to gigabytes of RAM represents a
million-fold increase in memory capacity. The NES operated with just
2 KB of main RAM, requiring extremely efficient programming. Modern
consoles like the Switch have 4 GB, enabling complex 3D worlds and
high-resolution textures.
Early gaming consoles were built around dedicated 2D graphics hardware
with hardware sprites and tile-based rendering systems.
| Console |
Graphics Processor |
Displayable Colors |
|---|
| Game Boy |
Custom Sharp LR35902 |
4 shades of gray |
| Game Boy Color |
Custom Sharp Z80 |
32,768, 56 max |
| NES |
PPU (2C02 or 2C03) |
52, 25 max |
| SNES |
S-PPU |
32,768, 256 max |
| PC Engine |
HuC6270A VDC |
512, 482 max |
| Neo Geo |
Custom LSPC2-A2 |
65,536, 4,096 max |
| Game Boy Adv. |
Custom 2D Core |
32,768, 512 max |
| Nintendo DS |
2D/3D Graphics Engine |
32,768, 4,096 max |
| Nintendo 3DS |
PICA200 GPU |
16.8 million |
| Wii |
ATI Hollywood GPU |
16.8 million |
| PSP |
Sony CXD2962GG + Media |
16.8 million |
| Switch |
NVIDIA Tegra X1 |
16.8 million |
| Console |
Sprite Size |
Max Sprites on Screen |
|---|
| Game Boy |
8x8 or 8x16 px |
40 sprites, max 10 per
line |
| Game Boy Color |
8x8 or 8x16 px |
40 sprites, max 10 per
line |
| NES |
8x8 or 8x16 px |
64 sprites, max 8 per line |
| SNES |
Up to 64x64 px |
128 sprites, max 32 per
line |
| PC Engine |
16x16 px |
64 sprites, max 16 per
line |
| Neo Geo |
Up to 16x512 px |
380 sprites, no strict
limit |
| Game Boy Adv. |
Up to 64x64 px |
128 sprites, max 32 per
line |
| Nintendo DS |
Up to 64x64 px |
128 sprites, max 32 per
line |
| Nintendo 3DS |
Variable |
Sprite handling via 3D
engine |
| Wii |
Variable |
Sprite handling via 3D
engine |
| PSP |
Variable |
Sprite handling via 3D
engine |
| Switch |
Variable |
Sprite handling via 3D
engine |
Key Observations:
Sprite-per-line limits were a critical constraint for 8-bit and 16-bit
consoles. Developers had to carefully manage sprite placement to avoid
flickering. The Neo Geo's massive sprite sizes (up to 16x512 pixels)
and high sprite count made it exceptional for arcade-style action games.
Display resolution, refresh rate, and aspect ratio define the visual
output characteristics of each console.
| Console |
Resolution |
Refresh Rate |
Aspect
Ratio |
|---|
| Game Boy |
160x144 |
59.7 Hz |
10:9 |
| Game Boy Color |
160x144 |
59.7 Hz |
10:9 |
| NES |
256x240 |
60 Hz (NTSC)
50 Hz (PAL) |
4:3 |
| SNES |
256x224
512x448i |
60 Hz (NTSC)
50 Hz (PAL) |
4:3 |
| PC Engine |
256x224 |
59.94 Hz |
4:3 |
| Neo Geo |
320x224 |
59.18 Hz |
4:3 |
| Game Boy Adv. |
240x160 |
59.7 Hz |
3:2 |
| Nintendo DS |
256x192
(per screen) |
59.8 Hz |
4:3 |
| Nintendo 3DS |
400x240 (top)
320x240 (bottom) |
60 Hz |
5:3
(top)
4:3
(bottom) |
| Wii |
640x480 |
60 Hz |
4:3 or
16:9 |
| PSP |
480x272 |
60 Hz |
16:9 |
| Switch |
1280x720
(Handheld)
1920x1080 (Docked) |
60 Hz |
16:9 |
Key Observations:
Resolution evolved from the Game Boy's 160x144 to Full HD (1920x1080)
on the Switch when docked. Most classic consoles targeted NTSC's 60 Hz
or PAL's 50 Hz refresh rates. The shift from 4:3 to 16:9 aspect ratios
occurred around the PSP/Wii generation.
Audio capabilities progressed from simple tone generators to full PCM
sample playback and streaming capabilities.
| Console |
Sound Channels |
Sample Rate |
|---|
| Game Boy |
4 (2 square, 1 wave,
1 noise) |
~8 kHz |
| Game Boy Color |
4 (same as GB) |
~8 kHz |
| NES |
5 (2 pulse, 1 triangle,
1 noise, 1 DPCM) |
~21.3 kHz (NTSC)
~17.3 kHz (PAL) |
| SNES |
8 PCM |
32 kHz |
| PC Engine |
6 PCM |
~7.16 kHz to
~20 kHz |
| Neo Geo |
4 FM, 3 PSG, ADPCM-A,
ADPCM-B |
~15.7 kHz
(ADPCM-A)
~18.5 kHz
(ADPCM-B) |
| Game Boy Adv. |
6 (2 direct PCM +
4 PSG) |
32 kHz |
| Nintendo DS |
16 PCM |
32 kHz |
| Nintendo 3DS |
24 PCM |
32 kHz |
| Wii |
64 PCM |
48 kHz |
| PSP |
32 PCM |
44.1 kHz |
| Switch |
32 PCM |
48 kHz |
| Console |
Audio Processor |
Audio Output |
|---|
| Game Boy |
Custom Sharp LR35902 |
Mono |
| Game Boy Color |
Custom Sharp Z80 |
Mono |
| NES |
Ricoh 2A03 (NTSC) /
Ricoh 2A07 (PAL) |
Mono |
| SNES |
Sony SPC700 + DSP |
Stereo |
| PC Engine |
HuC6280 PSG |
Mono |
| Neo Geo |
Yamaha YM2610 |
Stereo |
| Game Boy Adv. |
Custom 2D Core |
Stereo |
| Nintendo DS |
2D/3D Graphics Engine |
Stereo |
| Nintendo 3DS |
PICA200 GPU |
Stereo |
| Wii |
ATI Hollywood GPU |
Stereo / DPL II |
| PSP |
Sony CXD2962GG + Media |
Stereo |
| Switch |
NVIDIA Tegra X1 |
Stereo / DPL IIx |
Key Observations:
The SNES was revolutionary with its 8-channel PCM audio at 32 kHz,
enabling CD-quality sound. The transition from mono to stereo output
occurred in the 16-bit generation. Modern consoles support Dolby
Pro Logic surround sound encoding.
Beyond basic sprite and tile rendering, many consoles included special
graphics modes that enabled advanced visual effects.
Game Boy / Game Boy Color:
- No special graphics modes beyond basic tile and sprite rendering
NES:
- Attribute Tables (Limited Tile Coloring)
- CHR-ROM for Tile-Based Graphics
SNES:
- Mode 7: Affine transformations for scaling and rotation, enabling
pseudo-3D effects (used in games like F-Zero and Super Mario Kart)
- Windowing Effects: Variable transparency regions
- HDMA (Horizontal Direct Memory Access): Per-scanline effects
- Color Math: Hardware addition/subtraction for transparency and
lighting effects
PC Engine:
- No special graphics modes beyond standard tile/sprite capabilities
Neo Geo:
- Hardware Scaling for sprites
- Line Scroll: Independent line offsets for parallax effects
- Raster Effects: Per-scanline modifications
Game Boy Advance:
- Affine Transformation: Mode 7-like scaling and rotation
- Mosaic Effect: Hardware pixelation for special effects
- Alpha Blending: Multi-layer transparency
- Object Priority: Hardware Z-ordering for sprites and backgrounds
Nintendo DS:
- 3D Rendering: Hardware-accelerated 3D graphics engine
- Extended Affine Transformations: Advanced 2D rotation and scaling
- Fog Effects: Depth-based atmospheric effects
- Multiple Background Layers: Up to 4 background layers with
independent scrolling
Nintendo 3DS:
- Stereoscopic 3D: Glasses-free autostereoscopic 3D display
- Advanced Shader Support: Programmable vertex and fragment shaders
- GPU-Accelerated Rendering: PICA200 graphics processor
Wii:
- GPU Effects: Programmable shaders, bloom, motion blur
- Texture Mapping: Advanced texture filtering and mipmapping
- Bump Mapping: Per-pixel lighting simulation
- Hardware Anti-Aliasing: Multi-sample anti-aliasing (MSAA)
PSP:
- Hardware Transform & Lighting (T&L): Vertex processing on GPU
- Texture Compression: Efficient VRAM usage
- Advanced Alpha Blending: Complex transparency effects
Switch:
- Advanced Shaders: Physically-Based Rendering (PBR)
- Hardware-Accelerated Global Illumination: Realistic lighting
- HDR (High Dynamic Range): Expanded color and brightness range
- Post-Processing Effects: Depth of field, screen-space ambient
occlusion (SSAO), temporal anti-aliasing
Key Observations:
The SNES Mode 7 was revolutionary for its time, enabling pseudo-3D
effects with 2D hardware. The transition from fixed-function 2D
hardware to programmable 3D GPUs occurred around the Nintendo DS/PSP
generation. Modern consoles like the Switch support physically-based
rendering and advanced post-processing effects comparable to modern
gaming PCs.
The evolution of gaming console hardware represents one of the most
dramatic technological progressions in computing history. From the
humble Game Boy's 4.19 MHz processor and 8 KB of RAM to the Switch's
1+ GHz quad-core CPU and 4 GB of RAM, each generation brought order-of-
magnitude improvements in capabilities.
Understanding these hardware specifications is essential for homebrew
developers targeting specific platforms. The constraints of each
system - limited sprite counts, scanline restrictions, memory budgets -
defined the creative solutions developers employed to create memorable
gaming experiences.
Whether you're developing a Game Boy game with 40 sprites and 4 colors,
or a Switch title with millions of polygons and advanced shaders, these
specifications provide the foundation for understanding what's possible
on each platform.
For developers, these tables serve as quick references when planning
projects. For enthusiasts, they illuminate why certain games looked and
played the way they did. The ingenuity of developers working within
these constraints produced some of gaming's most iconic titles.
The security of embedded devices has never been more critical. In a world
where attacks targeting IoT systems are becoming increasingly sophisticated,
ensuring the integrity of the boot process is a must. This is where Secure
Boot comes in—an essential technology that guarantees only authorized code can
execute on a device from the moment it starts. In this article, we will explore
the implementation of Secure Boot using AHAB, the solution provided by NXP to
secure the i.MX93 from its initial boot stages.
Why is Secure Boot crucial for your device?
A secure boot ensures that no malicious code interferes with the critical boot
process, protecting your device from attacks targeting the bootloader and early
boot stages. Furthermore, AHAB, integrated into i.MX93 processors, enables
advanced authentication right from the initial boot stages, ensuring that only
validated components can be loaded, thereby strengthening security from the
get-go.
Secure boot is a critical security feature that ensures only authenticated and
authorized code can run on a device. It operates through a chain of trust, where
each component verifies the integrity of the next element in the chain.
Several mechanisms must be used to authenticate each element of this chain, but
the mechanism for authenticating the first boot stages depends on the target SoC.
The i.MX93 series uses NXP's Advanced High Assurance Boot (AHAB) to secure the
first boot stages.
For subsequent stages, you can implement mechanisms such as:
- Using U-Boot's "verified boot" feature to sign the kernel,
- Using the default environment (cf. USE_DEFAULT_ENV_FILE), and restricting
write access to only a few environment variables (cf. ENV_WRITEABLE_LIST),
which are necessary for writable access, such as for OTA updates,
- Using DM-verity to authenticate the root filesystem,
- And finally, using OverlayFS combined with DM-crypt to mount encrypted,
writable subfolders.
Here, we'll focus on the first part of the secure boot process, using NXP's AHAB
to authenticate the bootloader on the NXP i.MX93 in single-boot mode. We will
also briefly discuss how to generate the keys to sign the bootloader and provide
an introduction to AHAB.
Note: AHAB also provides a complementary encryption feature designed to protect
the confidentiality and integrity of data, whereas secure boot focuses on
verifying the integrity and authenticity of the boot process. This post will not
cover encryption in detail.
AHAB Architecture
The AHAB authentication mechanism is based on public key cryptography using
asymmetric keys.
On the i.MX93, AHAB support is provided by a security co-processor, the EdgeLock
enclave (ELE), which handles the authentication of binaries signed with one or
more private keys. This co-processor contains fuses that must be burned with the
hash of the public keys.
AHAB Containers
Since multiple boot stages (e.g., TF-A, OP-TEE, U-Boot, etc.) and firmwares are
required to boot i.MX93 platforms, these binaries are packed into containers
using the imx-mkimage tool:
bl31.bin
lpddr4_dmem_1d_v202201.bin
lpddr4_dmem_2d_v202201.bin
lpddr4_imem_1d_v202201.bin
lpddr4_imem_2d_v202201.bin
mx93a1-ahab-container.img
tee.bin
u-boot.bin
u-boot-spl.bin
In i.MX93 single-boot mode, the bootloader image contains at least three
containers:
- mx93a1-ahab-container.img: Contains the ELE Firmware.
- u-boot-atf-container.img: Contains at least the SPL.
- flash.bin: Contains TF-A, OP-TEE, and U-Boot.
        *start ----> +---------------------------+ ---------
                     |   1st Container header    |   ^
                     |       and signature       |   |
                     +---------------------------+   |
                     | Padding for 1kB alignment |   |
*start + 0x400 ----> +---------------------------+   |
                     |   2nd Container header    |   |
                     |       and signature       |   |
                     +---------------------------+   |
                     |          Padding          |   |  Authenticated at
                     +---------------------------+   |  ELE ROM/FW Level
                     |           ELE FW          |   |
                     +---------------------------+   |
                     |          Padding          |   |
                     +---------------------------+   |
                     |       Cortex-M Image      |   |
                     +---------------------------+   |
                     |         SPL Image         |   v
                     +---------------------------+ ---------
                     |   3rd Container header    |   ^
                     |       and signature       |   |
                     +---------------------------+   |
                     |          Padding          |   | Authenticated
                     +---------------------------+   | at SPL Level
                     |            TF-A           |   |
                     +---------------------------+   |
                     |           OP-TEE          |   |
                     +---------------------------+   |
                     |           U-Boot          |   v
                     +---------------------------+ ---------
These containers are signed offline using NXP Code-Signing Tools (CST), which
also allow the creation of an OEM private key infrastructure (PKI) and the
generation of the associated public keys (SRK) table, which is burned into the
fuses. The CST can also be used with the PKCS#11 standard to access
cryptographic services from tokens or devices such as HSM, TPM, and smart cards.
The first container is signed with NXP keys and is authenticated by the ELE ROM,
while the other containers are signed with OEM keys.
AHAB Boot Flow
In single boot mode, the Cortex-A55 ROM reads data from the selected boot
device, loading all containers in the chosen boot image set one by one. All
images within each container (e.g., EdgeLock secure enclave firmware, Cortex-M33
firmware, A55 firmware, OP-TEE, and U-Boot) are loaded, and the EdgeLock secure
enclave (ELE) is tasked with authenticating them. The ELE firmware is
authenticated by the ELE ROM, and images in the second container are verified by
the ELE firmware.
If the bootloader image contains more than two containers, the third and
subsequent containers are authenticated by the SPL instead of the ELE.
PKI Generation
To authenticate the bootloader, we need to generate keys. These keys can be
created with the CST. The private key will be used to sign the bootloader, and
the public key will be burned into the i.MX93 fuses to authenticate the
bootloader during boot.
Follow these steps to generate the keys:
cd cst-3.4.1/keys
echo 00000001 > serial
Write the passphrase for the certificate (replace "fooahabcert" with your
choice) in two lines, separated by \n. It is important to store this
passphrase securely with backups:
echo -e "fooahabcert\nfooahabcert" > key_pass.txt
Generate a P384 ECC PKI tree with a subordinate SGK key on CST:
./ahab_pki_tree.sh
[...]
Do you want to use an existing CA key (y/n)?: n

Key type options (confirm targeted device supports desired key type):
Select the key type (possible values: rsa, rsa-pss, ecc)?: ecc
Enter length for elliptic curve to be used for PKI tree:
Possible values p256, p384, p521:  p384
Enter the digest algorithm to use: sha384
Enter PKI tree duration (years): 10
Do you want the SRK certificates to have the CA flag set? (y/n)?: n
Generate the Signing Root Keys (SRK) Table and SRK Hash for 64-bit Linux machines:
cd ../crts/
../linux64/bin/srktool -a -d sha256 -s sha384 -t SRK_1_2_3_4_table.bin \
    -e SRK_1_2_3_4_fuse.bin -f 1 -c \
    SRK1_sha384_secp384r1_v3_usr_crt.pem,\
    SRK2_sha384_secp384r1_v3_usr_crt.pem,\
    SRK3_sha384_secp384r1_v3_usr_crt.pem,\
    SRK4_sha384_secp384r1_v3_usr_crt.pem
Do not enter spaces between the commas when specifying the SRKs in the "-c" or
"--certs" option. Otherwise, the certificates specified after the first space
will be excluded from the table.
Regenerate the SRK HASH (SRK_1_2_3_4_fuse.bin) using SHA256 with the
SRK_1_2_3_4_table.bin:
openssl dgst -binary -sha256 SRK_1_2_3_4_table.bin
Optionally, verify that the sha256sum of SRK_1_2_3_4_table matches the SRK_1_2_3_4_fuse.bin:
od -t x4 SRK_1_2_3_4_fuse.bin
0000000 29eec727 eaed9aa7 c7e53bc0 36835f78
0000020 6901bc47 b244753c f78d3162 27ae36b9
0000040
Bootloader Signature
The CST uses CSF description files to sign (and encrypt) containers generated by
imx-mkimage with OEM keys. When imx-mkimage generates containers, it also
specifies the block offsets to be used in the CSF description files. For
example, imx-mkimage returns the following values for your bootloader:
CST: CONTAINER 0 offset: 0x0
CST: CONTAINER 0: Signature Block: offset is at 0x190
CST: CONTAINER 0 offset: 0x400
CST: CONTAINER 0: Signature Block: offset is at 0x490
Where 0x190 is the block offset for the second container header and 0x490 is
the block offset for the third container header.
The CSF description file used to sign a container contains three sections:
- [Header]: Information about the HAB version to use for signing.
- [Authenticate Data]: Information about the key used to sign.
- [Install SRK]: Information about the container being signed.
The following CSF description files were used to sign the
u-boot-atf-container.img in our example:
[Header]
Target = AHAB
Version = 1.0

[Install SRK]
# SRK table generated by srktool
File = "SRK_1_2_3_4_table.bin"
# Public key certificate in PEM format
Source = "SRK1_sha384_secp384r1_v3_usr_crt.pem"
# Index of the public key certificate within the SRK table (0 .. 3)
Source index = 0
# Type of SRK set (NXP or OEM)
Source set = OEM
# bitmask of the revoked SRKs
Revocations = 0x0

[Authenticate Data]
# Binary to be signed generated by mkimage
File = "u-boot-atf-container.img"
# Offsets = Container header  Signature block (printed out by mkimage)
Offsets = 0x0 0x190
The following CSF description files were used to sign flash.bin in our
example:
[Header]
Target = AHAB
Version = 1.0

[Install SRK]
# SRK table generated by srktool
File = "SRK_1_2_3_4_table.bin"
# Public key certificate in PEM format
Source = "SRK1_sha384_secp384r1_v3_usr_crt.pem"
# Index of the public key certificate within the SRK table (0 .. 3)
Source index = 0
# Type of SRK set (NXP or OEM)
Source set = OEM
# bitmask of the revoked SRKs
Revocations = 0x0

[Authenticate Data]
# Binary to be signed generated by mkimage
File = "flash.bin"
# Offsets = Container header  Signature block (printed out by mkimage)
Offsets = 0x400 0x490
The first step is to generate a u-boot-atf-container.img, then copy the block
offsets into the CSF description file to sign it:
make SOC=iMX9 REV=A1 dtbs=imx93-11x11-evk.dtb u-boot-atf-container.img
Next, sign it with the following command and replace the unsigned version:
cst -i u-boot-atf-container.img.csf -o u-boot-atf-container.img.signed
mv u-boot-atf-container.img.signed u-boot-atf-container.img
Then generate a flash.bin containing the signed u-boot-atf-container.img:
make SOC=iMX9 REV=A1 V2X=NO dtbs=imx93-11x11-evk.dtb flash_singleboot
Finally, sign the resulting flash.bin:
cst -i flash.bin.csf -o flash.bin.signed
Burn Fuses
Once the signed flash.bin is flashed, you need to burn the public keys used to
sign the bootloader into the i.MX93 fuses to finalize AHAB secure boot. This
requires using a U-Boot that provides AHAB functionalities, such as checking ELE
events during bootloader authentication and securing the device.
Program SRK
The following commands enable AHAB secure boot by programming the
SRK_HASH[255:0] fuses on i.MX93, ensuring that only bootloaders signed with
keys matching the SRK hash programmed into the fuses will be accepted:
fuse prog -y 16 0 0x29eec727
fuse prog -y 16 1 0xeaed9aa7
fuse prog -y 16 2 0xc7e53bc0
fuse prog -y 16 3 0x36835f78
fuse prog -y 16 4 0x6901bc47
fuse prog -y 16 5 0xb244753c
fuse prog -y 16 6 0xf78d3162
fuse prog -y 16 7 0x27ae36b9
Close the Device
Once the SRK fuses are programmed, you can "close" the device to allow only the
bootloader signed with keys matching the SRK table to boot:
Before closing the device, you can verify that the fuses have been written
correctly by checking that no ELE events are raised:
ahab_status
Lifecycle: 0x00000008, OEM Open

No Events Found!
=>
Lifecycle: 0x00000008, OEM Open

No Events Found!
Once the device is closed, the ahab_status command will show OEM closed:
ahab_status
Lifecycle: 0x00000020, OEM closed

No Events Found!
=>
Lifecycle: 0x00000020, OEM closed
No Events Found!
As long as OEM Open appears in the status, the device is not secured and can still
execute unsigned bootloaders or those signed with invalid keys.
Conclusion
By implementing AHAB on the i.MX93 platform, you can ensure that your boot
process is protected from unauthorized code. The use of public key cryptography
and secure containers adds an extra layer of security, making your device more
resilient to attacks. This process is crucial for applications where integrity
and authenticity from the very first boot stage are paramount.
Introduction
The goal of the Zephyr project, hosted by the Linux foundation, since 2016, is to provide a safe and secured real time operating system (RTOS) for connected devices that are too small for Linux, or for core companion, through the Apache 2.0 open source license.
It is designed for resource-constrained devices such as microcontrollers and Internet of Things (IoT) devices, to be modular and scalable. This makes it ideal for a wide range of devices, from simple sensors to complex systems. The operating system is written in C and is fully compatible with the C11 and C++17 standards.
One of the key benefits of the Zephyr device model is its small footprint, it can be configured to run on devices with as little as 10 KB of memory.
It supports multiple 32 bits and 64 bits architectures: Cortex-A, Cortex-M, Cortex-R, RISC-V, x86-64, etc.
But it also support several boards and extensions: Feather, nRF52840, ST Discovery, ST Nucleo, ESP-32, etc.
It is able to manage several kinds of connectivity: Bluetooth, ethernet, wifi, LoRa.
And it support some network protocols: IPv4, IPv6,UDP, TCP, CoAP, LWM2M, MQTT, DNS, etc.
As Linux, Zephyr use Kconfig, and its device model is mainly based on device tree.
Device tree
Device trees are tree data structures that describe the hardware components and their relationships in a system.
They are stored in a text file, named device tree sources (*.dts), and they written by developers to describe hardware architectures of SoCs and boards.
And they are used by the operating system to determine how to initialize and interact with the hardware.
Each node describe a device of the system, has its own properties that describe their characteristics, and they have only one parent (except for the root node).
Each device driver is associated with a specific device tree node, which represents a hardware component in the system. The device driver provides the necessary code and data to control the behavior of the hardware component.
test_i2c_bme280: bme280@6 {
        compatible = "bosch,bme280";
        reg = <0x6>;
};
In the Linux kernel, device tree sources are compiled to device tree binaries (dtb) that are parsed, at boot, by bootloader stages (U-Boot, TF-A...) and the kernel to allow support several hardware configuration with same binaries.
But in Zephyr, device tree sources are transformed to a "devicetree_generated.h" C header file at build, that contains macro definitions and data structures allowing device drivers to access information about the hardware components in the system, such as the memory mapping of a device, its pin assignments, and its IRQ numbers:
#define DT_COMPAT_HAS_OKAY_bosch_bme280 1
#define DT_N_INST_bosch_bme280_NUM_OKAY 1
#define DT_FOREACH_OKAY_bosch_bme280(fn) fn(DT_N_S_soc_S_i2c_40005400_S_bme280_77)
#define DT_FOREACH_OKAY_VARGS_bosch_bme280(fn, ...) fn(DT_N_S_soc_S_i2c_40005400_S_bme280_77, __VA_ARGS__)
#define DT_FOREACH_OKAY_INST_bosch_bme280(fn) fn(0)
#define DT_FOREACH_OKAY_INST_VARGS_bosch_bme280(fn, ...) fn(0, __VA_ARGS__)
#define DT_COMPAT_bosch_bme280_BUS_i2c 1
Where:
- DT_COMPAT_HAS_OKAY_bosch_bme280: indicates that there is at least one instance of BME280
- DT_N_INST_bosch_bme280_NUM_OKAY: defines the number of BME280 instances that are marked okay
- DT_FOREACH_OKAY_bosch_bme280: allows you to apply a function fn to each instance of the BME280
- DT_FOREACH_OKAY_VARGS_bosch_bme280: also allows you to apply a function fn to each instance of the BME280, but with additional arguments
- DT_FOREACH_OKAY_INST_bosch_bme280: allows you to apply a function fn to each instance of the BME280, passing the instance number as an argument
- DT_FOREACH_OKAY_INST_VARGS_bosch_bme280: is similar to the previous macro, but this one allows for additional arguments
- DT_COMPAT_bosch_bme280_BUS_i2c: indicates that the BME280 device is connected to an I2C bus.
- DT_N_S_soc_S_i2c_40005400_S_bme280_77: refers to a specific node in the device tree, here it refers to the BME280 sensor connected to the I2C controller with the base address 0x40005400 within the SoC. The sensor's address on this I2C bus is 0x77.
In addition, device tree sources can be extended or overridden, for example to connect additional devices to a board, or to disable board devices which will not be used:
/ {
        aliases {
                bme280 = &bme280;
        };
};

&spi1 {
        status = "disabled";
};

&i2c1 {
        status = "okay";
        bme280: bme280@77 {
                compatible = "bosch,bme280";
                reg = <0x77>;
        };
};
Binding
Content of device tree sources is described in binding files, that are written in human readable and easy to parse YAML.
Binding files can be also used to validate device tree sources by comparing the information in the YAML file with the information in the device tree sources.
description: BME280 integrated environmental sensor

compatible: "bosch,bme280"

include: [sensor-device.yaml, i2c-device.yaml]
Device driver
In Zephyr, a device driver can access the properties of an associated node in the device tree using the macro that are defined in C header files.
For example, the following code can be used to initialize a BME280 sensor using properties defined in the device tree:
#include <device.h>
#include <drivers/i2c.h>
#include <devicetree.h>
#include <zephyr.h>

// Define the node identifier for the BME280 sensor
#define BME280_NODE DT_N_S_soc_S_i2c_40005400_S_bme280_77

// Function to initialize the BME280 sensor
static int bme280_init(const struct device *dev)
{
    // Check if the node is available
    if (!device_is_ready(dev)) {
        printk("Device %s is not ready\n", dev->name);
        return -ENODEV;
    }

    // Retrieve the I2C device associated with the BME280 node
    const struct device *i2c_dev = DEVICE_DT_GET(DT_BUS(BME280_NODE));

    if (!device_is_ready(i2c_dev)) {
        printk("I2C device not ready\n");
        return -ENODEV;
    }

    // Write some initialization code here, such as configuring registers

    printk("BME280 sensor initialized\n");
    return 0;
}

// Initialize the BME280 sensor at boot time
SYS_INIT(bme280_init, APPLICATION, CONFIG_APPLICATION_INIT_PRIORITY);
Conclusion
Those who have already implemented BSP or driver on Linux shouldn't encounter too much difficulty, but on the other hand, the step is a little higher for people coming from the world of micro-controllers.
Summary
This article is a tip that explains how it is possible to build a RIOT-OS
application with Podman and the official build container. And I would like to
take this opportunity to introduce you to Podman and RIOT-OS.
Podman
Some Linux distribution, like Fedora chosen to officially support only
Podman instead of Docker for several reasons:
- It is daemonless container engine.
- It is rootless.
- It follows Open Container Initiative (OCI) standards.
- It is safer than the Docker engine.
- It introduces the notion of Pods: a group of container(s) that share storage
or network resources.
Moreover, Podman is able to use the images built by the Docker engine and
has been stored in Docker registry.
However, most of the time the Podman commands are identical to that of
Docker, then a simple alias is enough to be misleading:
alias docker=podman.
But as Podman is rootless and safer than Docker, then sometimes it is
necessary to specify additional security parameters.
RIOT-OS
RIOT-OS is a memory-constrained RTOS, such as Contiki, that provides
real-time and multithreading abilities, and it runs on processors from 8bits to
32bits.
It was designed for IoT devices then to be low power consumption and it
provides three very complete network stacks including some protocols as:
The RIOT-OS project also provides some useful tools including a build
container (riotdocker).
And the build environment of RIOT-OS offers a Makefile to build an
application with this container simply by setting the variable BUILD_IN_DOCKER
to 1. Then the prebuilt image is downloaded and instantiated to execute the
make command.
By default, this feature is configured to be used with the Docker engine,
but it is possible to override some variables from the build environment
either to use a custom prebuilt image, either use another engine or to use
custom engine parameters.
Then here, we will use these environments variable to instantiate a container
with Podman (instead of Docker) and with the required parameters.
Tip of the day
In the following example, we build the Helloworld application for a STM32
Discovery board.
To do that we specify the engine by setting the variable DOCKER to the value
podman. The variable DOCKER_USER is set empty because in the variable
DOCKER_RUN_FLAGS the parameter --userns is set to keep-id to map the
uid:gid of the current rootless user (from host) with the values that will be
used into the container.
export BUILD_IN_DOCKER=1
export DOCKER="podman"
export DOCKER_USER=""
export DOCKER_RUN_FLAGS="--rm -i -t --security-opt seccomp=unconfined --security-opt label=disable --userns=keep-id"
export DOCKER_MAKE_ARGS="-j$(nproc)"

make BOARD=stm32l476g-disco
Launching build container using image "riot/riotbuild:latest".
podman run --rm -i -t --security-opt seccomp=unconfined --security-opt label=disable --userns=keep-id -v '/usr/share/zoneinfo/Europe/Paris:/etc/localtime:ro' -v '/home/tperrot/dev/tprrt/pwm-ramp-gen/RIOT:/data/riotbuild/riotbase:delegated' -e 'RIOTBASE=/data/riotbuild/riotbase' -e 'CCACHE_BASEDIR=/data/riotbuild/riotbase' -e 'BUILD_DIR=/data/riotbuild/riotbase/build' -v '/home/tperrot/dev/tprrt/pwm-ramp-gen:/data/riotbuild/riotproject:delegated' -e 'RIOTPROJECT=/data/riotbuild/riotproject' -e 'RIOTCPU=/data/riotbuild/riotbase/cpu' -e 'RIOTBOARD=/data/riotbuild/riotbase/boards' -e 'RIOTMAKE=/data/riotbuild/riotbase/makefiles'     -v '/home/tperrot/dev/tprrt/pwm-ramp-gen/.git:/home/tperrot/dev/tprrt/pwm-ramp-gen/.git:delegated' -e 'BOARD=stm32l476g-disco'  -w '/data/riotbuild/riotproject/' 'riot/riotbuild:latest' make 'BOARD=stm32l476g-disco'   -j8
Building application "hello-world" for "stm32l476g-disco" with MCU "stm32".

[INFO] cloning stm32cmsis
fatal: not a git repository: /data/riotbuild/riotbase/../.git/modules/RIOT
Cloning into '/data/riotbuild/riotbase/cpu/stm32/include/vendor/cmsis/l4'...
remote: Enumerating objects: 364, done.
remote: Counting objects: 100% (364/364), done.
remote: Compressing objects: 100% (71/71), done.
remote: Total 364 (delta 309), reused 344 (delta 289), pack-reused 0
Receiving objects: 100% (364/364), 709.56 KiB | 561.00 KiB/s, done.
Resolving deltas: 100% (309/309), done.
HEAD is now at e442c72 Release v1.6.1
[INFO] updating stm32cmsis /data/riotbuild/riotbase/cpu/stm32/include/vendor/cmsis/l4/.pkg-state.git-downloaded
echo e442c72651e8d4757f6562acc14da949644944ce   > /data/riotbuild/riotbase/cpu/stm32/include/vendor/cmsis/l4/.pkg-state.git-downloaded
[INFO] patch stm32cmsis
"make" -C /data/riotbuild/riotbase/boards/stm32l476g-disco
"make" -C /data/riotbuild/riotbase/core
"make" -C /data/riotbuild/riotbase/cpu/stm32
"make" -C /data/riotbuild/riotbase/drivers
"make" -C /data/riotbuild/riotbase/sys
"make" -C /data/riotbuild/riotbase/cpu/cortexm_common
"make" -C /data/riotbuild/riotbase/cpu/stm32/periph
"make" -C /data/riotbuild/riotbase/drivers/periph_common
"make" -C /data/riotbuild/riotbase/cpu/stm32/stmclk
"make" -C /data/riotbuild/riotbase/sys/auto_init
"make" -C /data/riotbuild/riotbase/cpu/cortexm_common/periph
"make" -C /data/riotbuild/riotbase/cpu/stm32/vectors
"make" -C /data/riotbuild/riotbase/sys/malloc_thread_safe
"make" -C /data/riotbuild/riotbase/sys/newlib_syscalls_default
"make" -C /data/riotbuild/riotbase/sys/pm_layered
"make" -C /data/riotbuild/riotbase/sys/stdio_uart
   text    data     bss     dec     hex filename
   8900     112    2300   11312    2c30 /data/riotbuild/riotproject/bin/stm32l476g-disco/hello-world.elf
Introduction
In this article, I will dissect how the chrt applet from the release 1.32.0 of Busybox works, what it does, etc.
This command is a Linux utils allowing to consult or to modify the scheduling attributes of a process.
chrt -m
SCHED_OTHER min/max priority    : 0/0
SCHED_FIFO min/max priority     : 1/99
SCHED_RR min/max priority       : 1/99
SCHED_BATCH min/max priority    : 0/0
SCHED_IDLE min/max priority     : 0/0
SCHED_DEADLINE min/max priority : 0/0

pidof firefox
6987 6851 6825 6816 6800 6771 6767 6761 6720 6611

chrt -p 6987
pid 6987's current scheduling policy: SCHED_OTHER
pid 6987's current scheduling priority: 0

sudo chrt -f -p 1 6987
chrt -p 6987
pid 6987's current scheduling policy: SCHED_FIFO
pid 6987's current scheduling priority: 1
Busybox provides an applet whose size, once compiled, is ten times smaller than that of the binary implementation
and with some limitations.
The dissection
The implementation of the chrt applet is in the file util-linux/chrt.c that containing several functions which are
called in the main function of this applet.
The main function of this applet is divided into three main parts:
- the first parses the command options
- the second prints the scheduler's information
- the last one, to apply scheduler changes in case of a set
At start of main, the character string containing the options are parsed to obtain a bitfield easier to use:
opt = getopt32(argv, "^"
                "+" "mprfobi"
                "\0"
                /* only one policy accepted: */
                "r--fobi:f--robi:o--rfbi:b--rfoi:i--rfob"
);
If the (-m) is set then the min and max valid priorities for each scheduling policies are shown and the command exits:
if (opt & OPT_m) { /* print min/max and exit */
        show_min_max(SCHED_OTHER);
        show_min_max(SCHED_FIFO);
        show_min_max(SCHED_RR);
        show_min_max(SCHED_BATCH);
        show_min_max(SCHED_IDLE);
        fflush_stdout_and_exit(EXIT_SUCCESS);
}
The function show_min_max uses the Posix functions sched_get_priority_max and sched_get_priority_min from the
standard C library to send a syscall to the kernel in order to obtain the min and max values accepted by each policy:
max = sched_get_priority_max(pol);
min = sched_get_priority_min(pol);
if ((max|min) < 0)
    fmt = "SCHED_%s not supported\n";
Otherwise the required options and arguments to show or to apply real-time attributes of a process:
//if (opt & OPT_r)
//  policy = SCHED_RR; - default, already set
if (opt & OPT_f)
    policy = SCHED_FIFO;
if (opt & OPT_o)
    policy = SCHED_OTHER;
if (opt & OPT_b)
    policy = SCHED_BATCH;
if (opt & OPT_i)
    policy = SCHED_IDLE;

argv += optind;
if (!argv[0])
    bb_show_usage();
if (opt & OPT_p) {
    pid_str = *argv++;
    if (*argv) { /* "-p PRIO PID [...]" */
            priority = pid_str;
            pid_str = *argv;
    }
    /* else "-p PID", and *argv == NULL */
    pid = xatoul_range(pid_str, 1, ((unsigned)(pid_t)ULONG_MAX) >> 1);
} else {
    priority = *argv++;
    if (!*argv)
            bb_show_usage();
}
Then the applet uses the Posix function sched_getscheduler provides by the standard C library to obtain the scheduling attributes of the process specified by the pid.
print_rt_info:
    pol = sched_getscheduler(pid);
    if (pol < 0)
            bb_perror_msg_and_die("can't %cet pid %u's policy", 'g', (int)pid);
Finally, when the chrt applet is used to modify scheduling attributes then the Posix function sched_getscheduler is used and the new scheduling attributes are showed:
if (sched_setscheduler(pid, policy, &sp) < 0)
    bb_perror_msg_and_die("can't %cet pid %u's policy", 's', (int)pid);

if (!argv[0]) /* "-p PRIO PID [...]" */
    goto print_rt_info;
The function sched_setscheduler and sched_getscheduler will send a syscall to the scheduler subsystem of the kernel Linux.
This subsystem also exposes this information from /proc:
cat /proc/6987/sched
WebExtensions (6987, #threads: 23)
-------------------------------------------------------------------
se.exec_start                                :       4421312.640001
se.vruntime                                  :        344438.942254
se.sum_exec_runtime                          :         38238.466094
se.nr_migrations                             :                 6811
nr_switches                                  :                49452
nr_voluntary_switches                        :                21749
nr_involuntary_switches                      :                27703
se.load.weight                               :              1048576
se.runnable_weight                           :              1048576
se.avg.load_sum                              :                 3415
se.avg.runnable_load_sum                     :                 3415
se.avg.util_sum                              :              3497621
se.avg.load_avg                              :                   74
se.avg.runnable_load_avg                     :                   74
se.avg.util_avg                              :                   74
se.avg.last_update_time                      :        4421312640000
se.avg.util_est.ewma                         :                   75
se.avg.util_est.enqueued                     :                   75
policy                                       :                    0
prio                                         :                  120
clock-delta                                  :                   89
mm->numa_scan_seq                            :                    0
numa_pages_migrated                          :                    0
numa_preferred_nid                           :                   -1
total_numa_faults                            :                    0
current_node=0, numa_group_id=0
numa_faults node=0 task_private=0 task_shared=0 group_private=0 group_shared=0
Limitations
Below a short list of limitations that I observed during my analysis of this applet.
Resetting scheduling policy
The chrt applet doesn't offer an option (-R) to specify if the scheduling policy should be applied or reset when a
process forks to create children. This feature, introduced since Linux 2.6.32, can be only enabled or disabled at the
build of busybox and it is applied on all scheduling attributes modifications done with this applet.
Deadline support
The chrt applet doesn't provide the required scheduling options (-d, -T, -P and -D) to set the deadline scheduling attributes of a process.
Introduction
Since some years, I haven't built an embedded Linux without using a framework, like Open Embedded from the Yocto
project.
Then here, I wanted to make a guide to help you to build quickly, from "scratch" a very minimal embedded Linux to boot a
target.
The following examples have been written to boot a virtual Qemu target but, they can be adapted to boot a real target.
Moreover, the build environment will be bootstrapped with a prebuilt cross-toolchain, I have chosen to use one provided
by Bootlin and using glibc.
Setup the environment
First, it is required to install the packages that are needed to install and use the cross-toolchain but also to compile the host tools and to provide Qemu:
- The Ncurses libraries are only required to execute the command make menuconfig.
- The certificates and wget will be used to download the prebuilt toolchain.
- In the same way, git will be used to checkout the source of Busybox and Linux.
- The Qemu packages will be used to emulate system platform and to execute static binaries cross-compiled for aarch64 on the x86-64 host.
apt update
apt install -y --no-install-recommends \
    bc \
    build-essential \
    ca-certificates \
    cpio \
    file \
    flex \
    git \
    ipxe-qemu \
    libncurses5-dev \
    libncursesw5-dev \
    libssl-dev \
    qemu \
    qemu-system-aarch64 \
    qemu-user-static \
    wget
Now, it is time to download and install the prebuilt toolchain:
mkdir ~/src
cd ~/src
wget https://toolchains.bootlin.com/downloads/releases/toolchains/aarch64/tarballs/aarch64--glibc--stable-2020.08-1.tar.bz2
tar xvjf aarch64--glibc--stable-2020.08-1.tar.bz2
Once the toolchain has been extracted you have to set the required environment variables to cross-compile binaries:
- PATH: It shall be extended so that the cross-tools from the cross-toolchain will be available from the environment
- CROSS_COMPILE: In order to clarify the prefix used by the cross-tools
- ARCH: The architecture of the target platform
ls ~/src/aarch64--glibc--stable-2020.08-1/bin/*gcc
~/src/aarch64--glibc--stable-2020.08-1/bin/aarch64-linux-gcc

export PATH=~/src/aarch64--glibc--stable-2020.08-1/bin:$PATH
export CROSS_COMPILE=aarch64-linux-
Now, it is possible to call the cross-tools from the shell:
aarch64-linux-gcc -v
Using built-in specs.
COLLECT_GCC=~/src/aarch64--glibc--stable-2020.08-1/bin/aarch64-linux-gcc.br_real
COLLECT_LTO_WRAPPER=~/src/aarch64--glibc--stable-2020.08-1/bin/../libexec/gcc/aarch64-buildroot-linux-gnu/9.3.0/lto-wrapper
Target: aarch64-buildroot-linux-gnu
<...>
Thread model: posix
gcc version 9.3.0 (Buildroot 2020.08-14-ge5a2a90)
Concerning the variable PATH this one will be set afterwards because its value depends on the binary that will be built.
Build the Linux kernel
So, the environment is ready to pull the sources of the latest stable branch of the kernel Linux and to build them:
git clone git://git.kernel.org/pub/scm/linux/kernel/git/stable/linux.git
cd linux
git checkout -b local/linux-5.4.y origin/linux-5.4.y
# git show HEAD

export ARCH=arm64

make defconfig
  HOSTCC  scripts/basic/fixdep
  HOSTCC  scripts/kconfig/conf.o
  HOSTCC  scripts/kconfig/confdata.o
  HOSTCC  scripts/kconfig/expr.o
  LEX     scripts/kconfig/lexer.lex.c
  YACC    scripts/kconfig/parser.tab.[ch]
  HOSTCC  scripts/kconfig/lexer.lex.o
  HOSTCC  scripts/kconfig/parser.tab.o
  HOSTCC  scripts/kconfig/preprocess.o
  HOSTCC  scripts/kconfig/symbol.o
  HOSTLD  scripts/kconfig/conf
*** Default configuration is based on 'defconfig'
#
# configuration written to .config
#

# make menuconfig

make -j$(nproc)
  <...>
  AR      drivers/net/ethernet/built-in.a
  AR      drivers/net/built-in.a
  AR      drivers/built-in.a
  GEN     .version
  CHK     include/generated/compile.h
  LD      vmlinux.o
  MODPOST vmlinux.o
  MODINFO modules.builtin.modinfo
  LD      .tmp_vmlinux.kallsyms1
  KSYM    .tmp_vmlinux.kallsyms1.o
  LD      .tmp_vmlinux.kallsyms2
  KSYM    .tmp_vmlinux.kallsyms2.o
  LD      vmlinux
  SORTEX  vmlinux
  SYSMAP  System.map
  Building modules, stage 2.
  MODPOST 531 modules
  OBJCOPY arch/arm64/boot/Image
  GZIP    arch/arm64/boot/Image.gz
The command make defconfig will apply the default configuration for the target platform (cf. ARCH=arm64), and the
compilation will be performed by make -j$(nproc).
The commands git show HEAD and make defconfig are optional:
- the first is useful to verify that the latest commit corresponding to the latest tag of the branch linux-5.4.y.
- the second can be used if you want to customize the kernel configuration.
NB. The kernel Linux but also Busybox and some projects use Kbuild to manage the build options
Populate the sysroot
The easy way to bootstrap a sysroot is to use Busybox that has been created to offer common UNIX tools into a single
executable and it is size-optimized. To create a sysroot, it is only required to add a few configuration files.
The steps to pull and build Busybox are similar to those of the kernel Linux.
git clone git://git.busybox.net/busybox
cd busybox
git checkout -b local/1_32_stable origin/1_32_stable
# git show HEAD

export ARCH=aarch64
export LDFLAGS="--static"

make defconfig
# make menuconfig
make -j$(nproc)

make install
Here, the LDFLAGS is set to force static linking of Busybox quickly, but it is also possible to use
make menuconfig to set CONFIG_STATIC=y. The advantage of the static executable is that it can be tested with Qemu:
qemu-aarch64-static busybox echo "Hello!"
Hello!
qemu-aarch64-static busybox date
Sat Jun 27 15:06:41 UTC 2020
The binary qemu-aarch64-static allows to execute a binary built for another architecture on the host computer, for
example here it allows to execute the Busybox binary compiled for an aarch64 target on a x86-64 host.
The last command make install created a tree into the _install directory that can be used to populate the sysroot:
ls -l _install
total 4
drwxr-xr-x. 1 tperrot tperrot 974 Nov 30 15:22 bin
lrwxrwxrwx. 1 tperrot tperrot  11 Nov 30 15:22 linuxrc -> bin/busybox
drwxr-xr-x. 1 tperrot tperrot 986 Nov 30 15:22 sbin
drwxr-xr-x. 1 tperrot tperrot  14 Nov 30 15:22 usr

ls -l _install/bin
<...>
lrwxrwxrwx. 1 tperrot tperrot       7 Nov 30 15:22 umount -> busybox
lrwxrwxrwx. 1 tperrot tperrot       7 Nov 30 15:22 uname -> busybox
lrwxrwxrwx. 1 tperrot tperrot       7 Nov 30 15:22 usleep -> busybox
lrwxrwxrwx. 1 tperrot tperrot       7 Nov 30 15:22 vi -> busybox
lrwxrwxrwx. 1 tperrot tperrot       7 Nov 30 15:22 watch -> busybox
lrwxrwxrwx. 1 tperrot tperrot       7 Nov 30 15:22 zcat -> busybox
In order, to finalize this minimal sysroot, it is required to create a rcS init script:
mkdir _install/proc _install/sys _install/dev _install/etc _install/etc/init.d
cat > _install/etc/init.d/rcS << EOF
#!/bin/sh
mount -t proc none /proc
mount -t sysfs none /sys
/sbin/mdev -s
[ ! -h /etc/mtab ]  && ln -s /proc/mounts /etc/mtab
[ ! -f /etc/resolv.conf ] && cat /proc/net/pnp > /etc/resolv.conf
EOF
chmod +x _install/etc/init.d/rcS
Build the filesystem
The target of this step is to package the sysroot tree into a filesystem that can be mounted by the kernel.
There is two available possibilities, either build a ramfs or a rootfs.
Globally, the difference between both is that:
- the ramfs is a very simple filesystem that can be used by the kernel to create a block device into the RAM space from an archive.
- the rootfs is a filesystem mounted from a non volatile device by the kernel.
For more information about the difference between the ramfs and the rootfs, you can you refer to the kernel documentation.
Build a ramfs
To build the ramfs we will use cpio and gzip to construct the compressed archive after modifying the rights:
mkdir _rootfs
rsync -a _install/ _rootfs
chown -R root:root _rootfs
cd _rootfs
find . | cpio -o --format=newc > ../rootfs.cpio
cd ..
gzip -c rootfs.cpio > rootfs.cpio.gz
Build a rootfs
To build the rootfs, the first step is to create an empty binary blob that will be mounted into a loop device to be
formatted to create a ext3 filesystem. Then the tree can be copied and the rights updated.
dd if=/dev/zero of=rootfs.img bs=1M count=10
mke2fs -j rootfs.img
mkdir _rootfs
mount -o loop rootfs.img _rootfs
rsync -a _install/ _rootfs
chown -R root:root _rootfs
sync
umount _rootfs
Boot the target
Following, the qemu commands to boot the minimal embedded Linux system that has been built.
# With the ramfs
qemu-system-aarch64 -nographic -no-reboot -machine virt -cpu cortex-a57 -smp 2 -m 256 \
    -kernel ~/src/linux/arch/arm64/boot/Image \
    -initrd ~/src/busybox/rootfs.cpio.gz \
    -append "panic=5 ro ip=dhcp root=/dev/ram rdinit=/sbin/init"

# With the rootfs
qemu-system-aarch64 -nographic -no-reboot -machine virt -cpu cortex-a57 -smp 2 -m 256 \
    -kernel ~/src/linux/arch/arm64/boot/Image \
    -append "panic=5 ro ip=dhcp root=/dev/vda" \
    -drive file=~/src/busybox/rootfs.img,format=raw,if=none,id=hd0 -device virtio-blk-device,drive=hd0
Then the target will be boot to shell, "It's alive!":
[    0.000000] Booting Linux on physical CPU 0x0000000000 [0x411fd070]
[    0.000000] Linux version 5.10.0-rc5 (tperrot@27ea4a863f61) (aarch64-linux-gcc.br_real (Buildroot 2020.08-14-ge5a2a90) 9.3.0, GNU ld (GNU Binutils) 2.33.1) #1 SMP PREEMPT Mon Nov 30 14:40:05 UTC 2020
[    0.000000] Machine model: linux,dummy-virt
<...>
[    0.858346] Sending DHCP requests ., OK
[    0.870558] IP-Config: Got DHCP answer from 10.0.2.2, my address is 10.0.2.15
[    0.870909] IP-Config: Complete:
[    0.871199]      device=eth0, hwaddr=52:54:00:12:34:56, ipaddr=10.0.2.15, mask=255.255.255.0, gw=10.0.2.2
[    0.871566]      host=10.0.2.15, domain=, nis-domain=(none)
[    0.871825]      bootserver=10.0.2.2, rootserver=10.0.2.2, rootpath=
[    0.871866]      nameserver0=10.0.2.3
[    0.872389]
[    0.875863] ALSA device list:
[    0.876151]   No soundcards found.
[    0.879353] uart-pl011 9000000.pl011: no DMA platform data
[    0.920237] Freeing unused kernel memory: 5952K
[    0.921223] Run /sbin/init as init process

Please press Enter to activate this console.